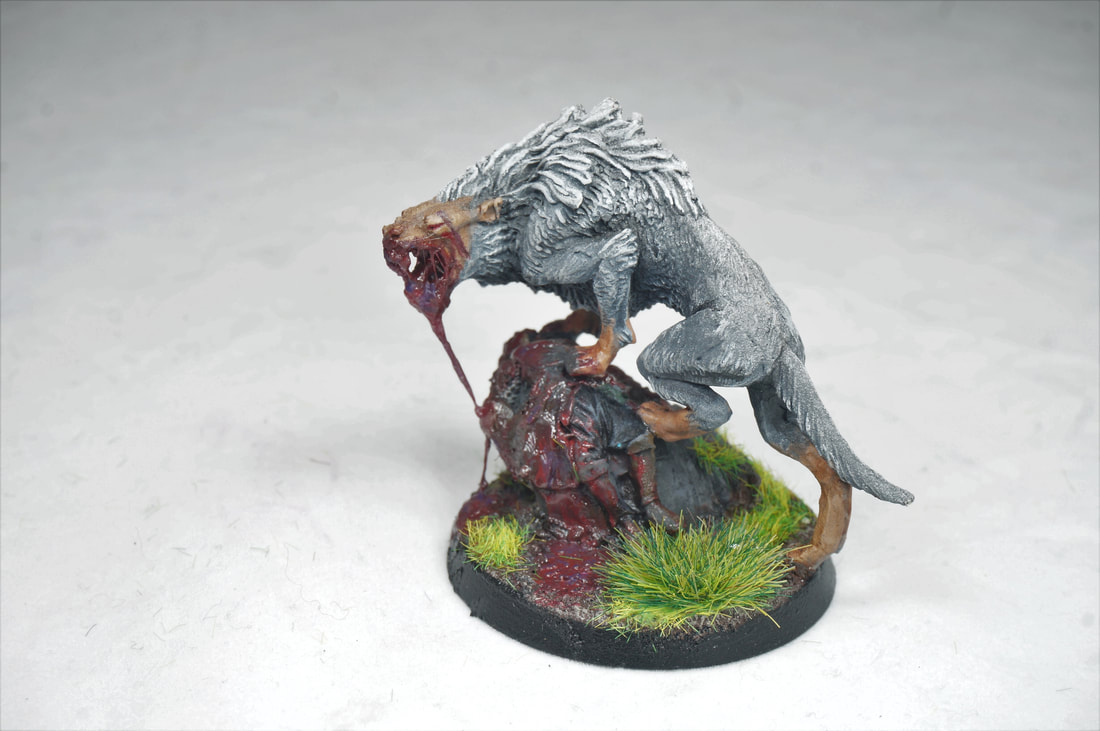
 I took a second swing at the blood and gore effect on this warg chieftan. With a little creativity, time, patience and in the end a tiny little dot of pruple paint (for that good old "innards" look) and i think i nailed it. I am very happy with the result and it really makes the model stand out agains't it's counterparts, that and the "old man" style grey to white fur. 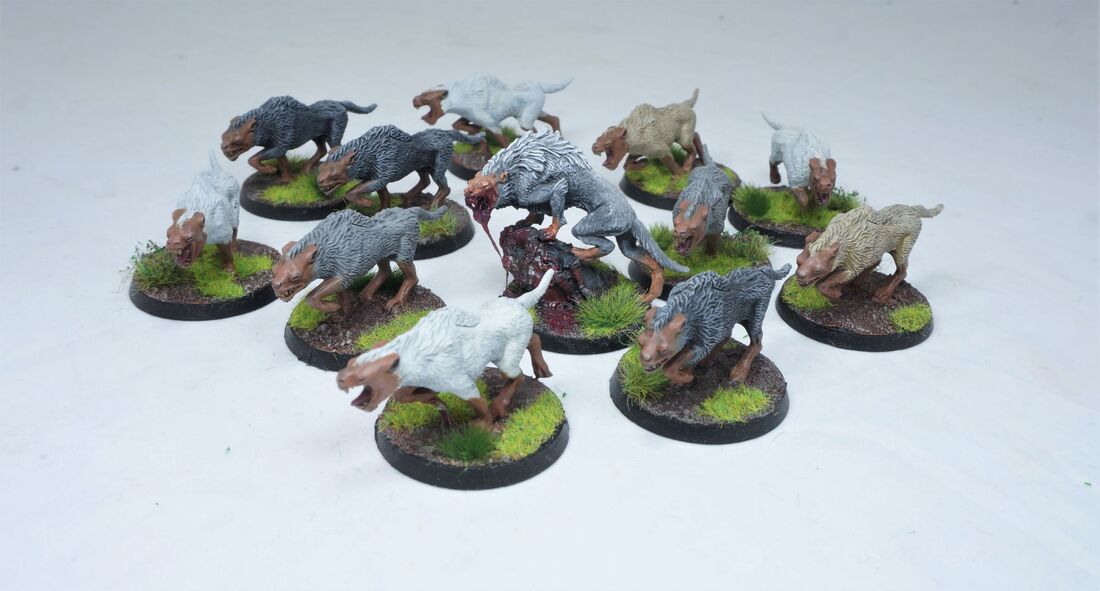
0 Comments
Starting off today i roughed up these wights i painted for my client recently. He asked me to make them dirter, more "old world" so i went with a nice burnt umber, orange, silver tip "rust" effect i have been practising recently when i get the chance. I applied the effect over both the silver and the gold armor and i think it worked well and they look explicitly less "clean". I also added glowing eye and mouth sockets, they really look ready for battle now! I went to the shops and tracked down some gloopy all purpose glue to try out this bloody maw effect i saw ages ago (maybe 2003!) I'm sure i haven't pulled it off properly but i will admit i rushedly applied it when i could have taken more time. Likely i will re do this before asking for a final verdict from my client as i think he will really like it when i get it right. 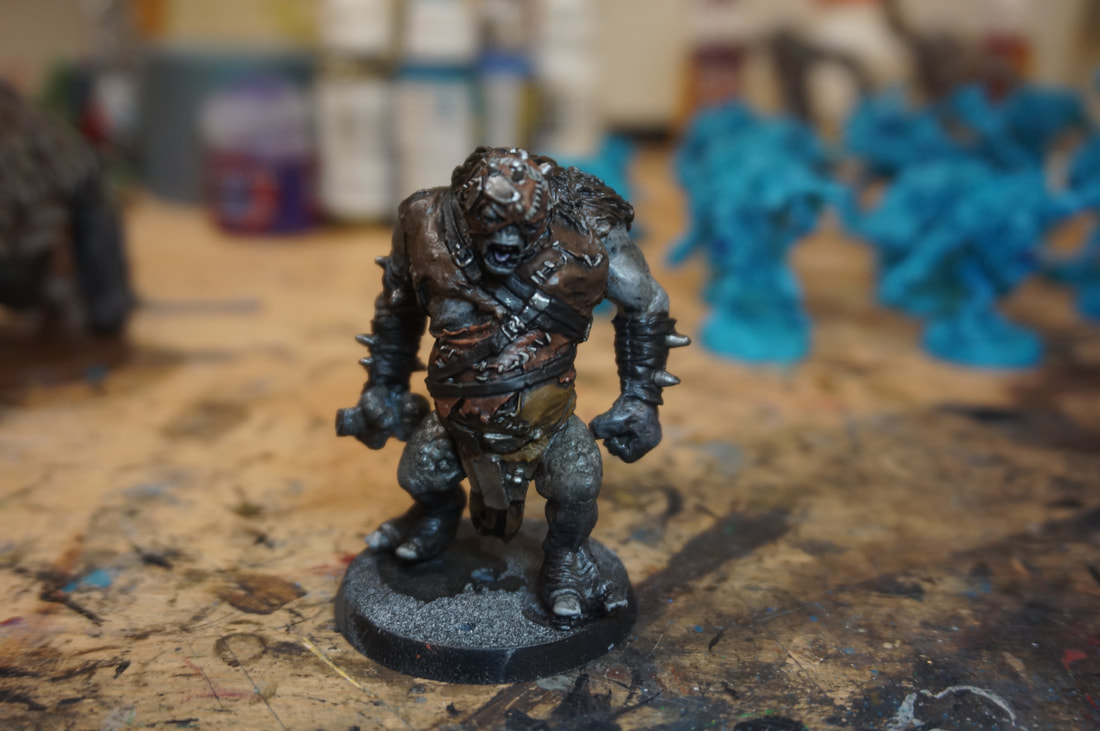 I thoroughly enjoyed basecoating the troll chieftan, what a mad model with such invigorating character qualities. I have had to do some dremel work on the sword as it's broken at the worse place and just keeps coming off with even careful handling (it takes a tiny poke!) Hopefully it's stronger today now that is dried (done after photography here). Perhaps the most interesting model of this paint sesh is this orc captian model from the "not bloodbowl" orcs i'm doing. What a fascinating and interesting piece with so many curious little elements to paint. Pictured here half done with the fur finished but the rest still needing finishing.  I have painted the skin of these orcs now by giving them a soft dark blue wash and two highlights of turquoise blue and then a light sky blue for lips, eyes and fingers and such. I decided to contrast the blue with purple tongues which i'm sure is going to look stellar.
 The army green spray i had from sprayster.com is perfect for my turtles. I went back and forth on the idea of doing them in the cartoon or the movie tone but i think i'll start with a cartoony green and then work them down and back into a more grimey look halfway between the two. I am definitely going to encorperate the famous freckles from the movie versions, i always like how they had that black dot with a white dot inside them look, like little backwards eyes. Pardon my internet but it takes so long to upload pics. I really enjoyed these trolls. They may still need a touch up, some more blending at the grainier areas but these older sculpts are kind of grainy in their apearence so i think most of that is the mix of techniques i used to paint them (washing and drybrushing can create that effect, you could call it "dusty"). I think they look great, i'll be eager for my clients feedback on these. Primarilly i think maybe the loin cloths might need a touch up to make them pop a bit more, as they are they blend in a little to well, but if my client likes the naturalistic look then it might just suit perfectly. All of these criticisms come from my own inner insecurities having seen so many pictures of these famous models and wondering if i did a good job myself. I didn't even realise how much i was looking forward to this warg model. What a captivating sculpt! I haven't finished the grasses yet but i can't wait to put some thick bushels of siflor tufts under that rock to really give the apearence of the warg climbing up to look out over the hills of rohan! I felt the dead body needed to be gory, and i played it safe on blood on the actual warg itself. That feral mixed fur look wouldn't fare to well with a load of blood splatter. I mixed three different red and gloss mixes and used it to blend a brownish/red ish pool of blood at the feet of the casualty and then used the darker of the mixes in and around the lower jaw of the warg. I kind of want to get some "multi purpose glue" (the cheap stuff that doesn't really stick anything together but stretches and can be used to make blood trails) and make some gloopy blood dripping from his mouth. In my experience clients tend to generally veer away from models being to bloody. So i think we shall se what my client says. As a warm down i painted my first harry potter model, i think i slayed those greens which i was worried about coming out to flat and they came out great. The hair also was very fun, working with blonde is always exciting. as expected the base was an underwhelming experience and negotiation. I managed to paint it to a nice standard but actually forgot to photograph it. More to come soon.
Finishing these romans was a blast. I had such fun whipping through the highlights and painting up those dawby cloth tons and mixed metals. What a group of awesome little dudes (and dudettes). I painted the bases to match the mixed color cobble look of the civilian bases and then i also painted the test models base to match. I went more sparringly on the leaves on these and by jove has it made them look even better. The bigger bushels of leaves look awesome on the group bases but the smll spattering here and there really sells the individual fighters well. I haven't many major comments on these at their finish point, i think i've said all that needs to be said about them in the previous posts (see ancients categories in the sidebar) but i shall say a few of them where a nightmare to get their weapons to stay on. i don't fully trust (even given all i have tried) that they will stay. I shall inform my client of this. The net man specifically was a nightmare. I hope he makes the journey ok! I shall wrap him in bubble wrap as usual but also use some card around him gfor extra stability during postage. 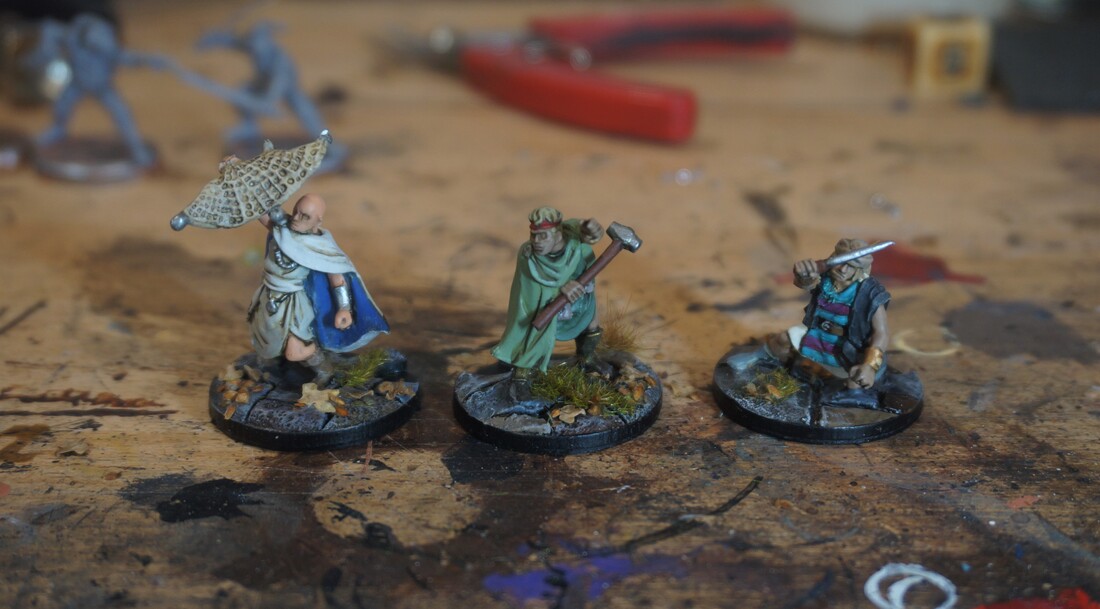 NINJA TURTLES!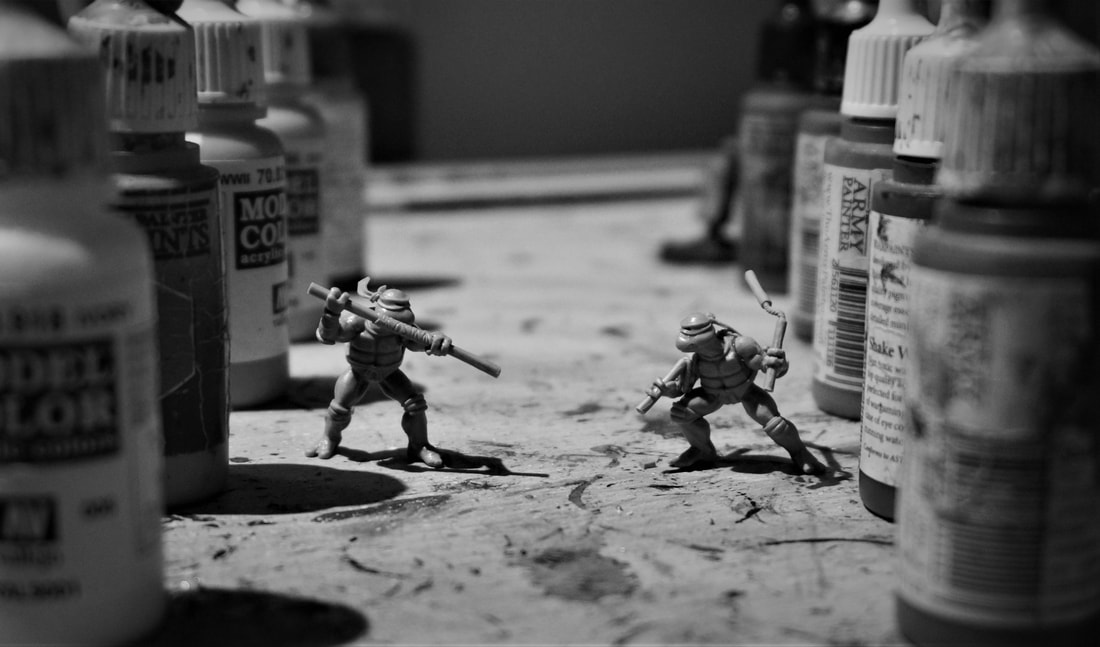 I have jus tpurchased some of Brother Vinis beautiful resin turtles for my city fight game to act as a ninja gang! I hope indeed he does a splinter model soon! LINK TO THE SHOP THEY'RE FROM  The sculpts are exquisite. Perhaps the best resins i've ever seen and that's saying something since last week i thought the Knight models resins where (harry potter models) but knight models is not one guy printing presumably at home. How awesome that he manages to get such a highly proffesional finish. There was barely a piece of flash, barely anything broke (and what did was due to my negligence) and they has zero print lines at all. Honestly phenominal. I got a new sander and a new dremel the other day and i wanted heavy bases for these super lightweight models so i clamped and glued two 2 pence piece for each model and then i took my new sander and set to work like a medieval blacksmith. About 40 minutes later with some res ttime because the pennies got very hot i had some custom and heavy bases for these awesome guys. I can't wait to get them painted and get play testing with them, ninjas jumping all over the bloody shop. It's going to rock. CAVE TROLLSI have been waiting to get to these trolls for a while and i am so excited to try a new method i pioneered on the dragons. Using images from google i went to my spray booth, picked out three skin tones, a black, two greys, a white and a beige and i slowly and gently built of layers of paint, as though using an airbrush (yet 100 times cheaper, easier, quicker and safer) and i am so pleased with the result. Not only is the blending natural and to be honest kind of perfect for what i had in mind but the paint work was minimal (at this point). Following these images i inked them black with a watered down ink so as to not lose those lovely blends and after these photos where taken i finished them up with some dry brushing, highlighting and picking out of details. I will post the finished results soon as i want to let them sit for a night and come back to them in the morning. this way of painting "big" models isn't just logical but it looks amazing. I cna't get over how well the colors blend and how much like natural skin the finish is.  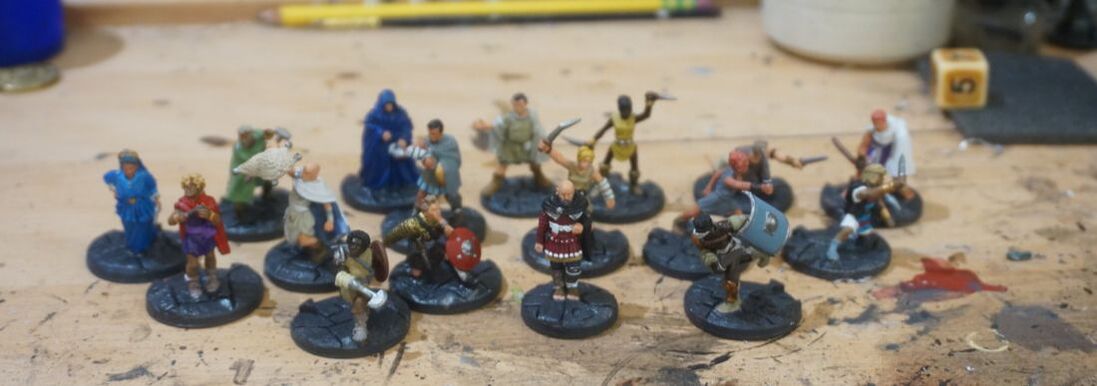 This last two days has been busy! I finished off those base coats on those roman fighters and they're ready for inking and finishing now. I really enjoyed them in the end even though they took a while to get the motivation up for them. Usually when there's a bit of free hand involoved (bottom of capes, some shirts etc) then can be put off for a while, but once you get started it always becomes more fun and flows. I bought myself some of the astounding harry potter sculpts (they're massive to) and assembled them ready for painting and hopefully my first proper planned re sales on etsy or ebay. I figured it's a nice way to implement my income while not straining myself creatively if i've got a few single figures up here and there. Sadly the base tabs on these have to be some of the worse "slot in" situations (for how well they blend, or in this case don't) and i had to some filling on the bases. For miniatures that cost about £10.00 each i'm honestly shocked at this. Truly. Thre return of angmar! The remaining Angmar pieces turned up and i got to work drilling, pinning and filling these trolls and warg. They're funny these old trolls, they are SO HEAVY which is so odd since they're rather small for "big" models. I had to fill over the paint work of the painted troll and i'm under the impression my client wants it touched up but not painted, i may ask if he's comfortable with me doing a re paint, as i don't imagine he will blend that well with the style i'm currently working this angmar stuff in.
Last week was my birthday so a week of skateboarding and barbeques where on hand. I didn't get a lot of time to work. This week i resume the process. Firstly i aim to get those romans done. After that i'm going to focus on the remaining lord of the rings bits from Lukas order that just turned up! (we're talking cave trolls guys!)  Experimenting in magnets.The beauty of City grounds (my new game) is that it's my own game. And i can make models look however i want. I decided to dive into my bits box feeling inspired by my client Bram who does some awesome work with magnets. I built two "leaders" for two new teams that we can play. One is an instectoid with bow and arrow and the other is a human soldier with a magnetised left arm. I'm excited to paint and play them and then after each game we could upgrade their weapons and change their arms which is super cool. I found that using my actual drill (full size 18V drill) was quicker for this job than using a hand drill (modeling one) as if just get's tiresome trying to make the magnet holes deep enough with a tiny drill bit.
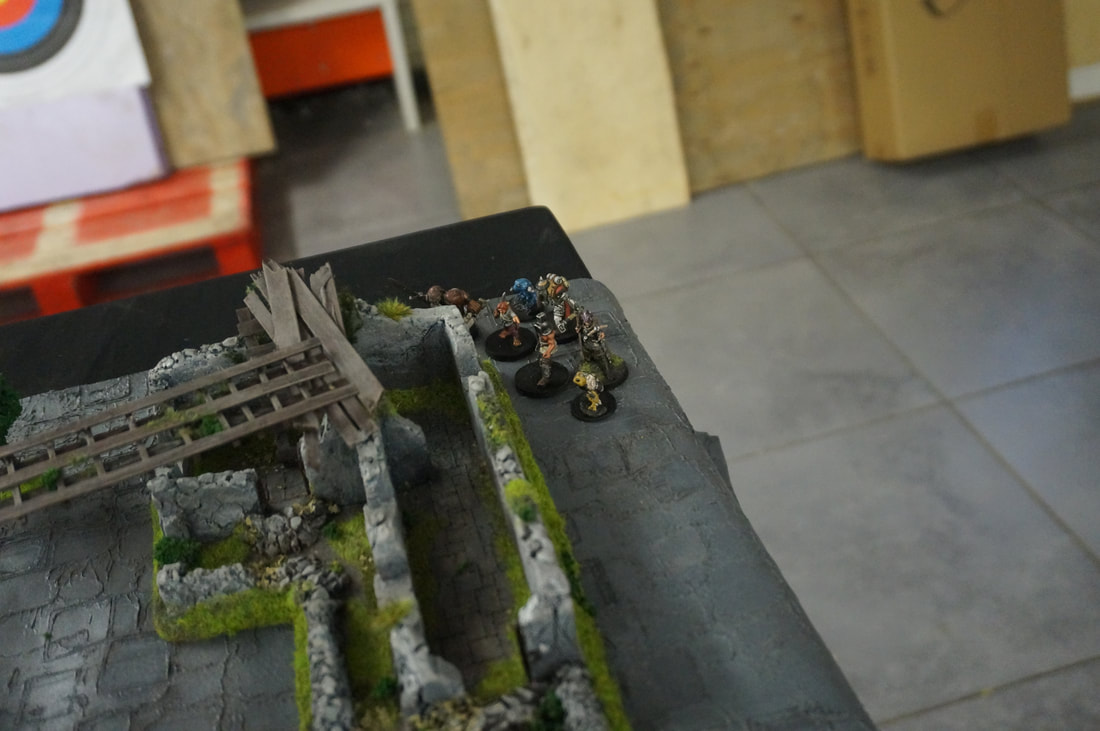
 Our next test game for City Grounds was based in a fantiscal forest fort on the edge of a ruined village. A band of orcs (with a trained warg) decided to push their luck and expand the boundaries of their nearby camp. A small gang of Frogmen hired a few human archers to help with the defence of their tiny town. THe forest town of the frogmen has lots of high ground and complete defensible walls. Four human archers back up the two frog archers, two spearmen (one with shield) and their leader. 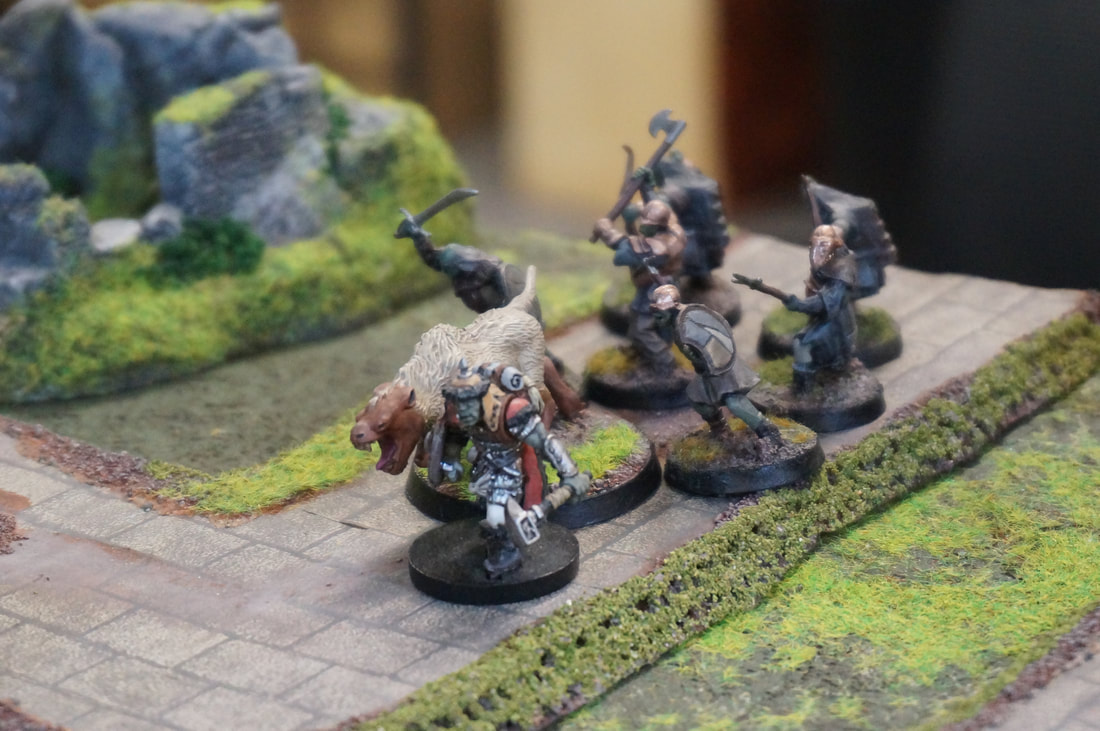 The gang of orcs (our orc model from the last game, in our heads he was coming back to reek revenge!), two shield and sword men, two spearmen and two archers. Acompanying them was our first test cavalry model, a warg! Low defense, high armour and high wounds. The first few tunrs saw the frog team take defensive formation upon the walls, tower and front door. The orcs advanced slowly as we worked out some pass/fail roll rules meaning that now if you fail one action, but succeed another you may act out the one you succeed, instead of a total failure on a model. At this point in the game we also started pontificating about height advantages on archery, as we had some really high up models. Our orc leader managed to charge the front door and start laying into it accordingly. The door wasn't strong but a few unlucky rolls and it stood another turn. Meanwhile the orc archers kept firing on the walls and the frogs kept firing back. We deduced that if you are 0-5" above another model, you shoot at the usual category (range bracket) then if you are 5-10/10-15 etc above them you may move down the amount of categories that you are above, e.g. a model three sections up can shoot a model at very long range, but it will count as short range. These rules are still in the works as they could be very OP but given the way the rules work, ranges work and the difficulty of hitting it definitely has a realistic (if not just logical) feel to it. Much to my shagrin Toms orcs managed to get up to and bash down the door, his spearmen also progressed onto the battlements which we made accesible from all sides so they could be climbed. He also managed to basically jump the wall with his warg and dive into the fray that way, it was chaos. Short range shots being popped off by the humans and frog dropping like flies. We introduced a "brace" rule for miniatures within 2" of the door they wish to defend meaning they can add defence to the structure. With the door down things where looking grim for the frog team. Fighting on difficult ground (the fallen door) the orc leader had one unlucky round and with fustrations mounting on both sides the game ended in turn 6. I think we where both glad as it began to get comically competetive and because our first game went on forever we decided to cut it off after two hours. When playtesting most of the process is talking and taking notes but even with that in mind this game was certainly smoother and much more fun than the first. The next step before more test games is to make some ruins (generic osgiliath style) for us to play in a proper ruined city.
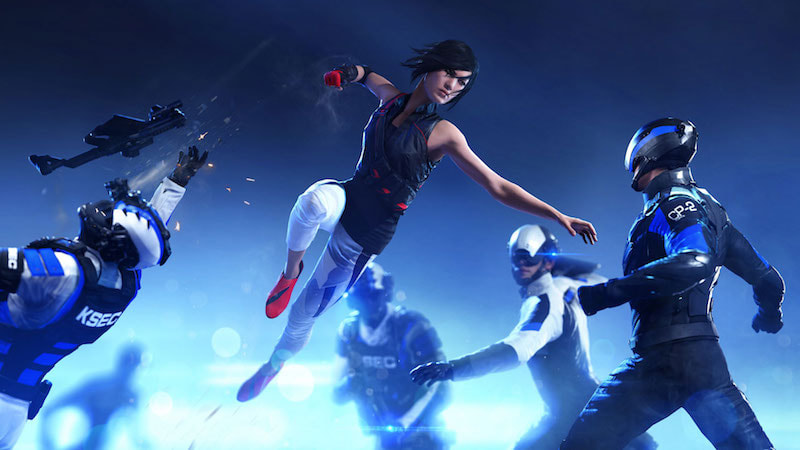
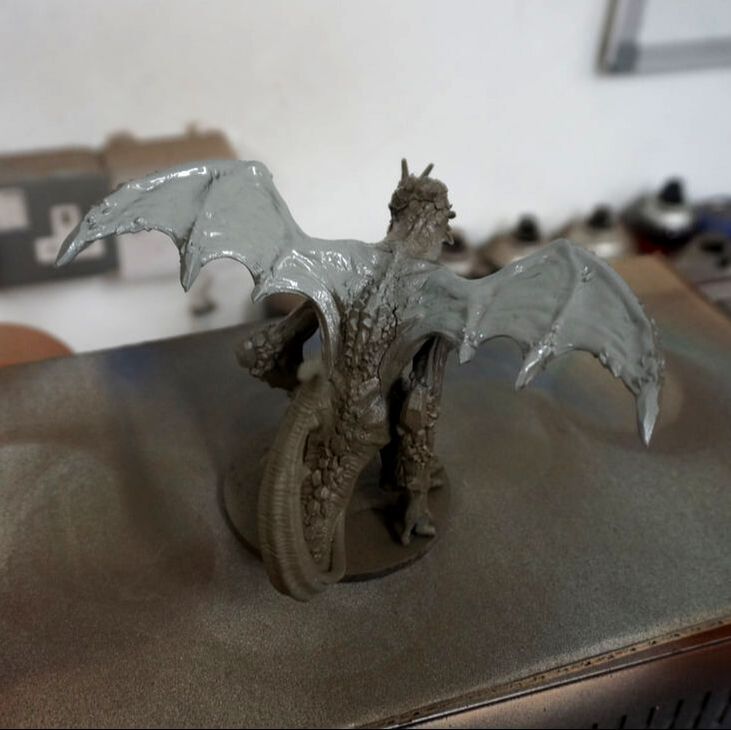
I managed to get that beautiful purple gem dragon done this last two days and i had a whale of the time. I really enjoyed those purples and buying those new paints was the way to do. There's some minor touching up and blending left to do but other than that he's basically done and by gosh is he cool! Also i think mainly due to the skin tones (the pinks beiges) the mdoel looks so much better now than it did in resin grey. Not that i couldn't see how cool it was i just feel like it looks more real and natural now. As though it's a bit odd to show people pictures of this pre paint as the mold was so strange but looks so normal painted up. It's as though those wierd arms just blend in now. 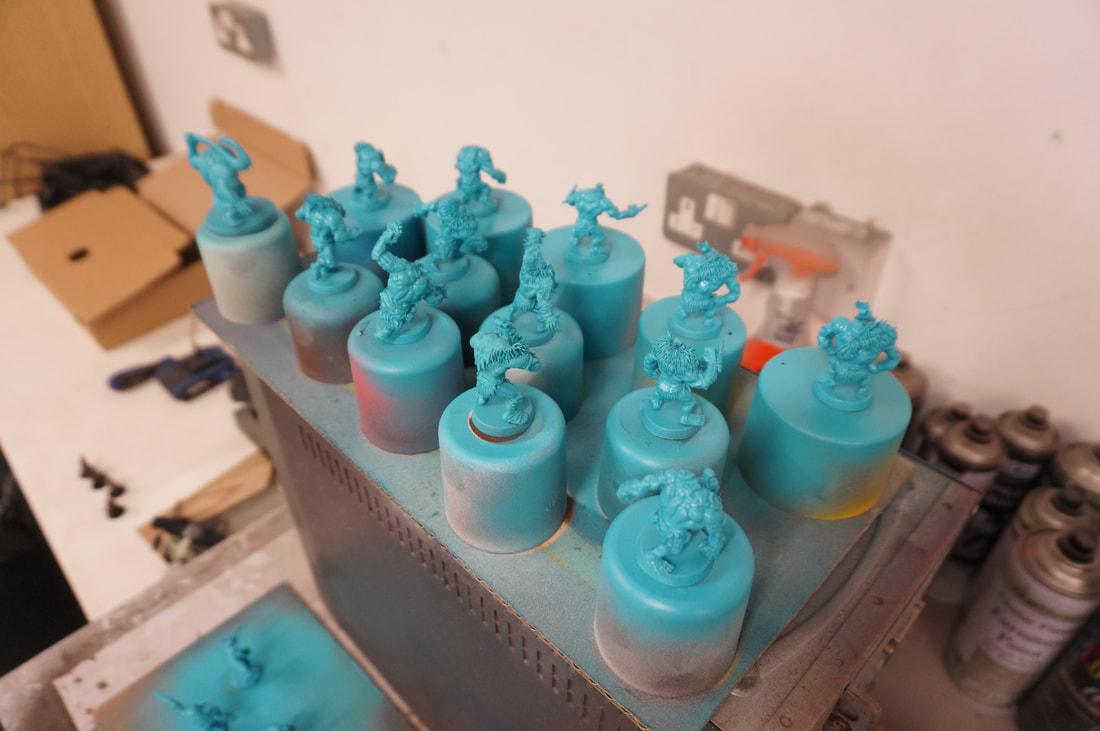 So i'm probably a week or two away from actually getting around to these guys (due to it being my b day this week and there being other stuff in the queue) but the secon my client sent me the below inspiriation pic i couldn't help myself and dove into action. They will likely stay this way for a few days but i wanted to show you guys this beautiful cian i got for undercoating these as it's just so gorgeous! I've been a long time waiting for an excuse to do blue orcs, and now that i've had a commission of them it means two things: 1. I may get more for this order, which is exciting and will be fantastic for my already broad and interesting portfolio. 2. I will now have this beautiful turquoise in my "arsenal". I should say also that these where the nicest resins i've ever assembled and they absolutely S*** all over the games workshop resins, such care taken over quality assurance. There was literally ONE extra bit of resin i had to break off and that was it.  PROGRESS ON THE DRAGONI got a bit more done on this guy before i stopped last week. I need to clean it up and add the purple before i ink it, i want to use a weak ink on this one as i want to do most of the mottling and fading before the ink. The purples have been freaking me out a bit so i went to the local friendly gaming store and i grabbed two brand new purples from GW. I find GW paints can be really good especially after just opening. So given my track record with purple i thought i'd grab two new tones.  During my time as a commission painter i have written and released a few wargames. Two of which i released on kickstarter and they got a fair bit of attention. One of my games "City Grounds", a mordheim inspired city fight style game has been in development for many years and only this year during lockdown did i begin working on it again. The game is a fun mix of gang fighting, skirmish style mechanics and it is inspired by the manouvers and actions of parkour style films and video games (such as mirrors edge or district 13).
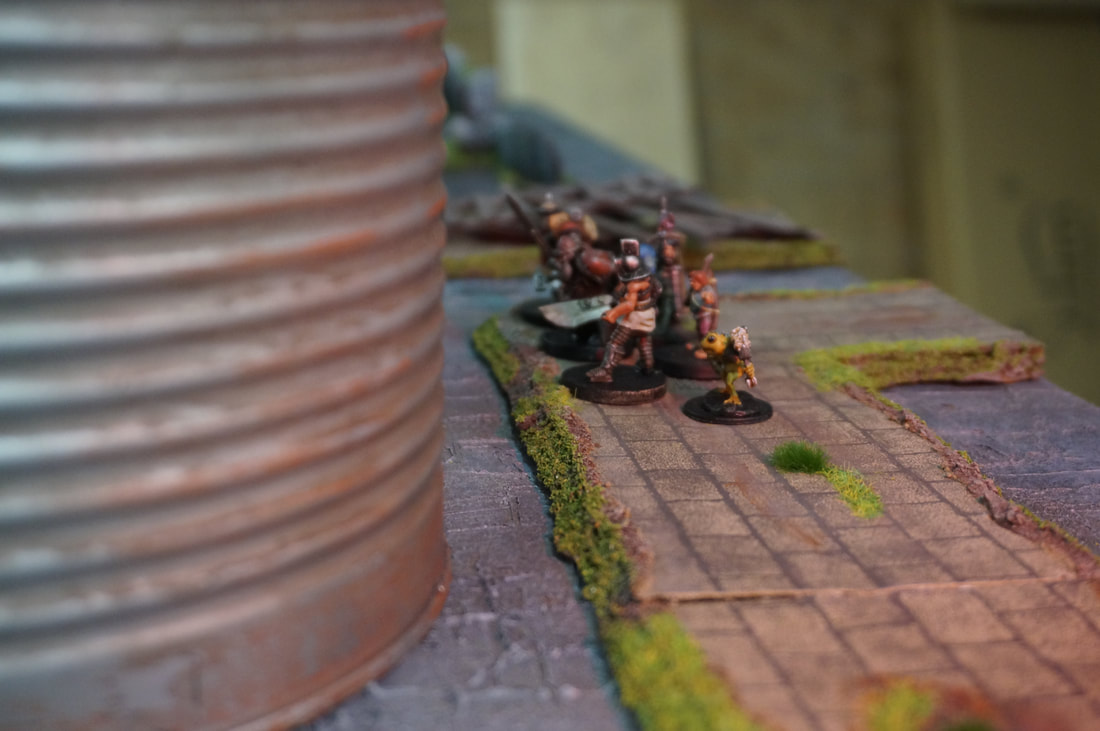
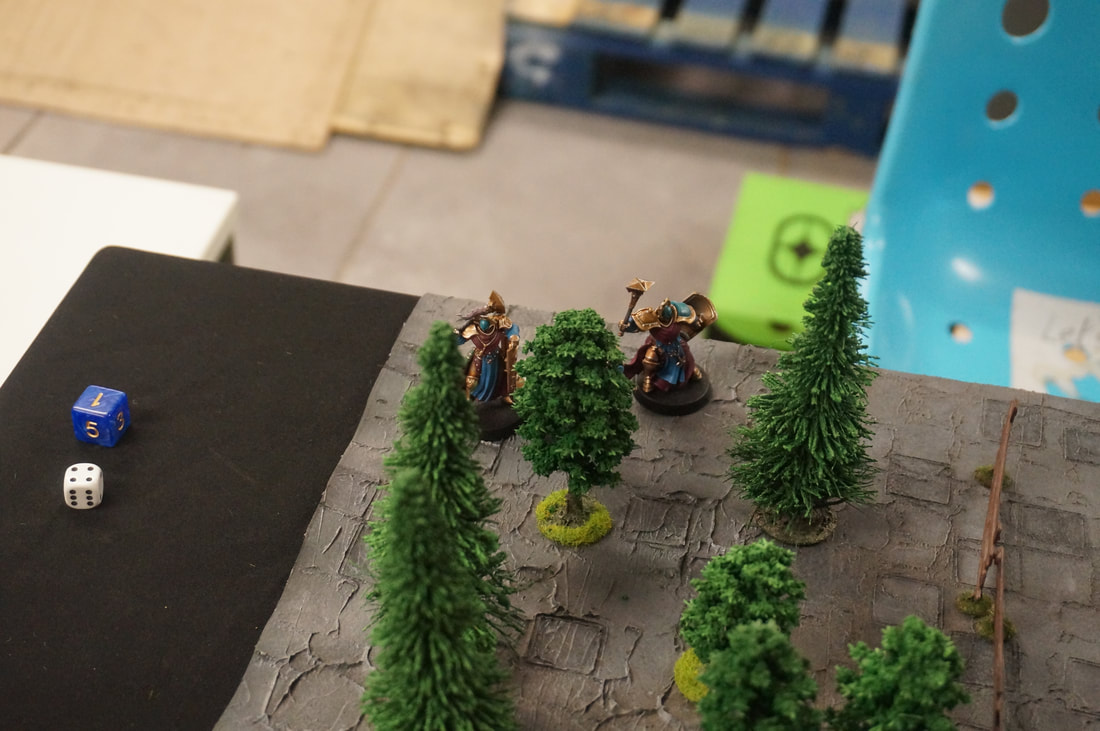
Since this was our first physical play test of the system in nearly 8 years we decided to play a simple territory grab. We had two markers, one on the factory and one on the water tower. Whoever held each (within 2") at the end of each turn (up to 6 turns) wins a point of renown. Kills also gain a point. 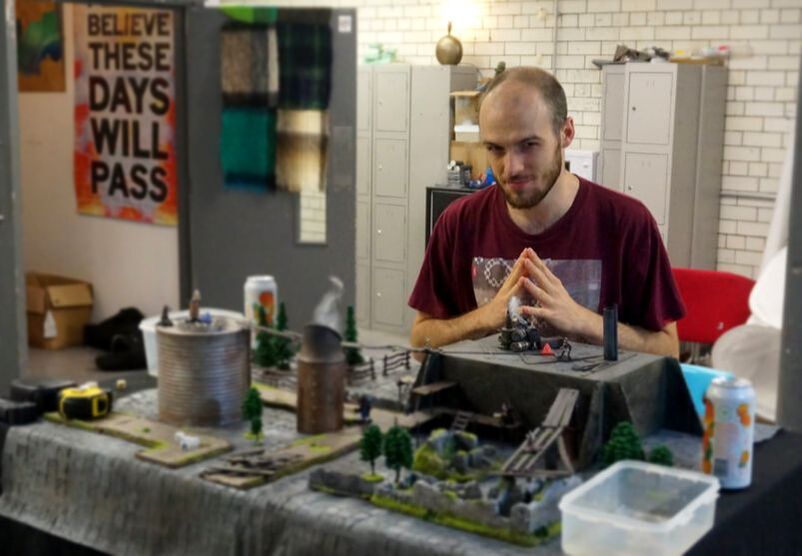 My old buddy Tom playing the Constabulary (below in blue and purple) and as usual kicking my hiney.
After priority rolls we set up on either side of the board. Tom took the woods and i took the ruins. THE GAMEDuring the first few turns the rabble split in half and attempted to climb the ruins while also meandering into town. Due to the activation rolls rules the rabble kept hillariously failing actions and stood fairly still for a while. We dove into the game so fast that we forgot some basic rules e.g. "most basic actions first" which increases your chance of elongating your own turn as more successes means more turn. The constabulary had better luck and took control of both Dens within two turns. There was no combat yet but because this was a playtest game we where fairly busy flipping and jumping over things (in game). As the game progressed the constabulary continued to have a solid grasp on the victory locations. The rabble tried to push in and had some success but where pushed back again and again by the constabulary. Many bad rolls plagued the rabble including a few hillarious "snake eye moments" concluding in many funny falls from height and some damages. The rabble took a few tragedies as they tried to push off the constabulary but many failures ensued including a drastic death of Gorthak (our orc) who was kicked off the top of the water tower by one of the constabulary. There was one really fun parkour moment where the dark elf character from the rabble ran the full height of the water tower and contested the location for a turn, sadly also getting kicked off the top and falling also to his death. As tom piled up points of renown one after another (he scored a total of 12 to my 0 which is hillarious) the rabble finally got some good rolls and got up to the victory locations. With just a few turns left they made a good effort to push back the constabulary but the combast where brief as the constabulary are so strong. The game concluded in an obvious win for the constabulary. WHAT DID WE LEARN DURING THIS GAME?- Fall damage needs tobe revised and extended. - Rough terrain/ high terrain needs to be modified to include balance mechanics to give more gravitas to fantastical acrobatic feats. - Models cannot run up ladders now. - footing tests for unarmoured models on high ground who may fall due to actions. - adding Dive, Tackle and Swing actions. - Removal of bonus dice on extra hard rolls. - Attacks of oppertunity need some minor revision. - Jump distances have been changed. - Punch and kick prerequesites changed and shortened. - Points values for wounds have been added. 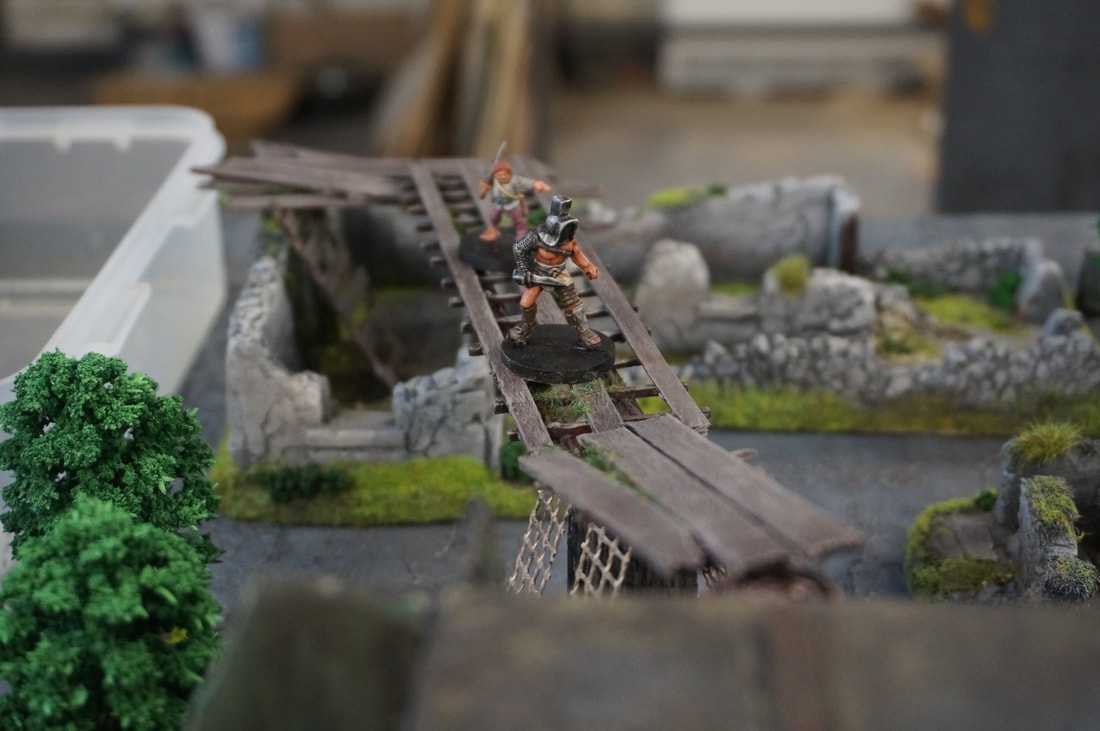 OUR NEXT GAME?We will be playing the same game (swapping teams) this week and then hopefully purchasing some new teams (probably simple 5-10 man teams in different races). I am excited to have a playtester friend again as i haven't been able to test my games for a long time. Keep your eyes peeled for more soon!
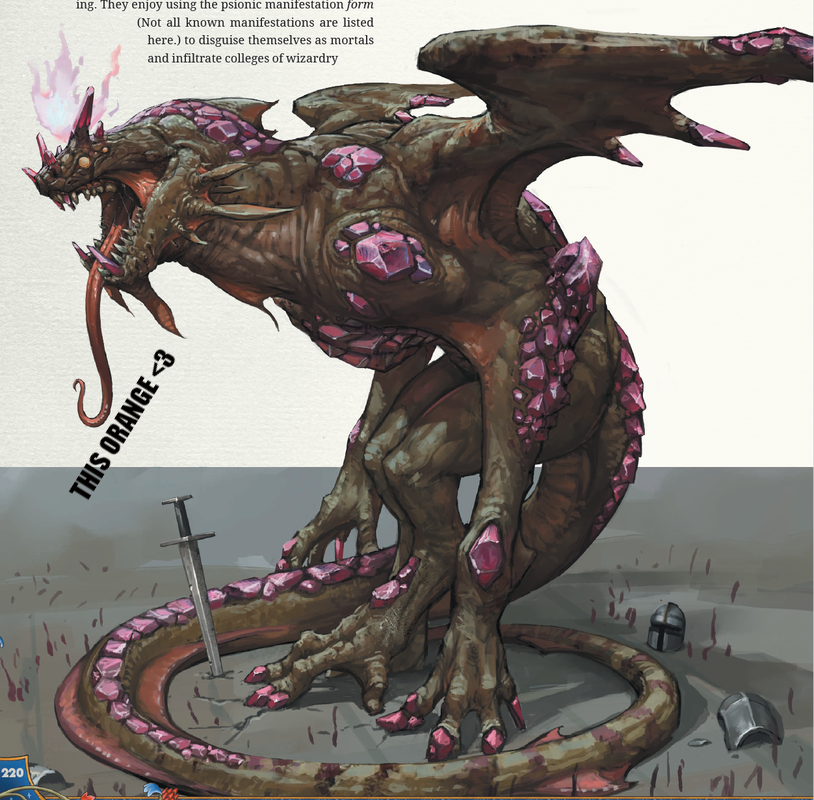 My final Dragon in the big 6 i was sent by my client Dom is a large and boney Gemstone dragon. He is painted and pictured in the art reference in purple. I left this guy till last for one simple reason. Purple hates me. I have bought P3, vallejo, games workshop etc and i have always found purple to be a color that just doesn't seem to want to be painted in small scale. Am i missing something? Yes, likely i am. I will do my reserach for this model, but starting out i gave it a grey undercoat with a light to blue grey gradient on the wings which will give me a great base to work from.
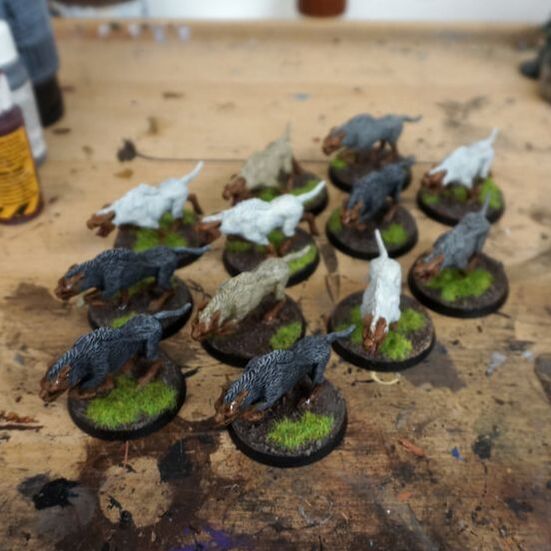
If this dragon doesn't remind you of Clover, then either you haven't seen the movie or you forgot to put your eyes in today.  FIXING UP SOME WARG SKINRecently i finished these "wild wargs" for my client. Mildly disapointed by games workshops re release of warg models that are designed for miniatures to go on their backs (therefore having literall flat backs with no fur) i sculpted som extra fur on and then gave them a lick of paint. Not to linger on the point but come one games workshop (or as i call them the "evil empire") you literally could sculpt a bit of fur on them and THEN re release them. Such money hungry, money grabbing desperation and it deeply saddens me. The capitolistic nature of our industry is saddening. 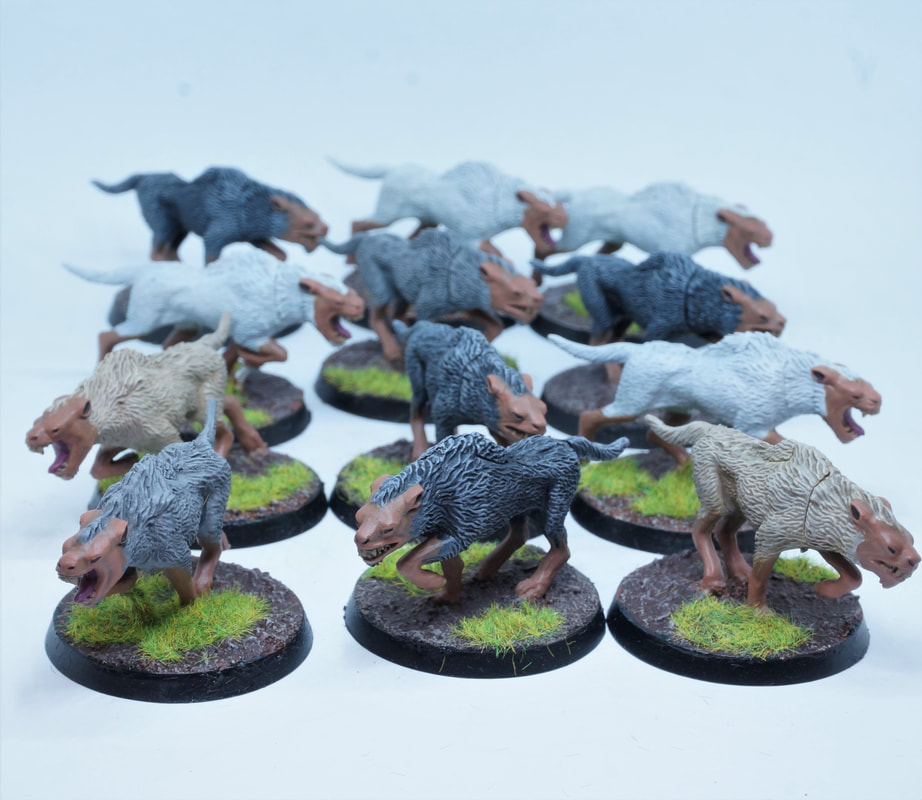 Although my client was appreciative of the little effort and paint job he did say that the skin was "to clean" and i agreed immediately. I think that's a second danger of these basically detailed models, they will always have a danger of seeming to clean. As a fix i decided to mix a flesh wash/home made black wash and added that onto the models skin today and it has worked a treat. I imagine i may go back and give them a little beige drybrush later today when they're dry.
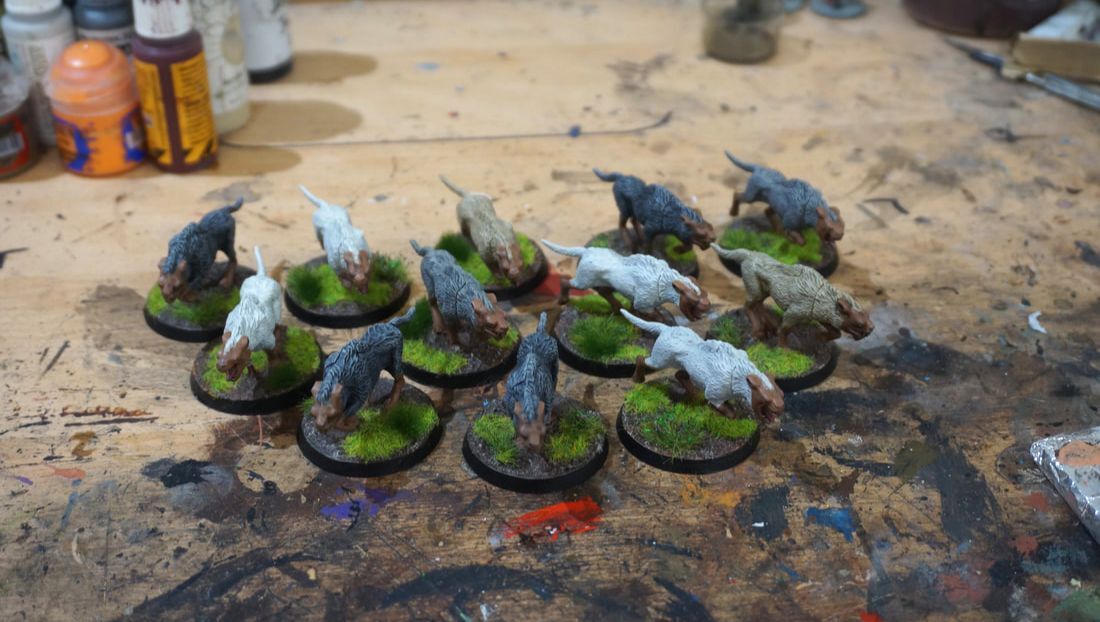 The touch up on those wargs went really well and since i have since received a big old mix of flowery siflor tufts from ebay i decided to upgrade their bases a bit to as the general "green" static grass wasn't helping their slightly cartoonish finish. Either way it was detracting from the naturalistic tone of the project.  HEADING BACK TO VALHALLA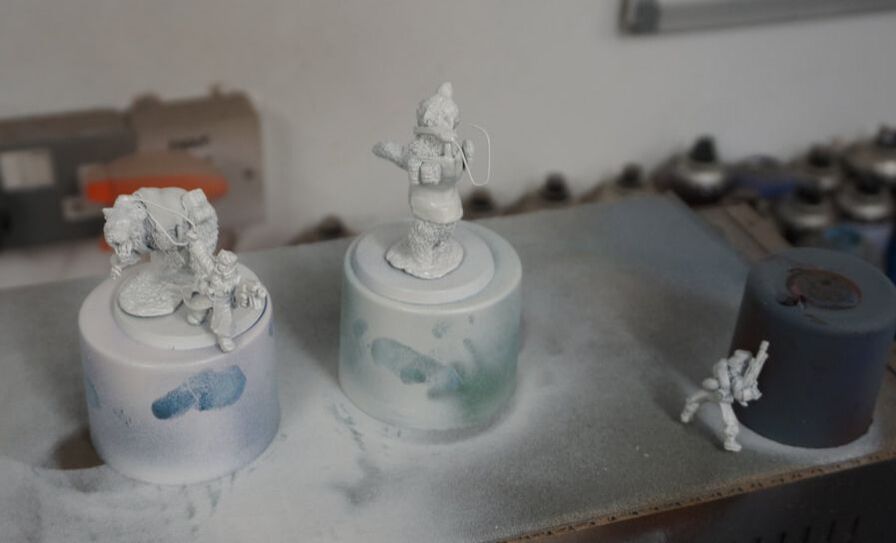 In the coming weeks i will be dipping back into (and finishing) Brams Valhallan order (although we all know that this army....will never be finished and i'm half tempted to get an old frost giant model and convert it to be some kind of behemoth ogryn captain for bram sometimes, that's how extravagant and exciting his imagination is!). Bram has a fantastic imagination and has created these amazing bear riders (rough rider stand ins) using foundry bears. Below is a picture of the last ones i painted.  ROMAN FIGHTER COBBLE BASESI am a decisive artist generally. I don't tend to back and forth on decisions but with these roman models i did a bit. Should i remove the tabs entirely and pin them, should i do the bases first and them stick them down, should i match these to the mob bases even though i did the test model slightly differently and then found that the mob bases would have been much harder to do correctly in the previous style. I wouldn't say they threw me, moreso i might say i just couldn't decide so i let them sit on the back burner a few days while i did the mob bases and got them painted. Now that i finished them and stood them next to the fighter test model i could see that regardless of the style of cobble the coloring, flocking and overall general art style (being my own usual naturalistic, gritty one) matched quite well. 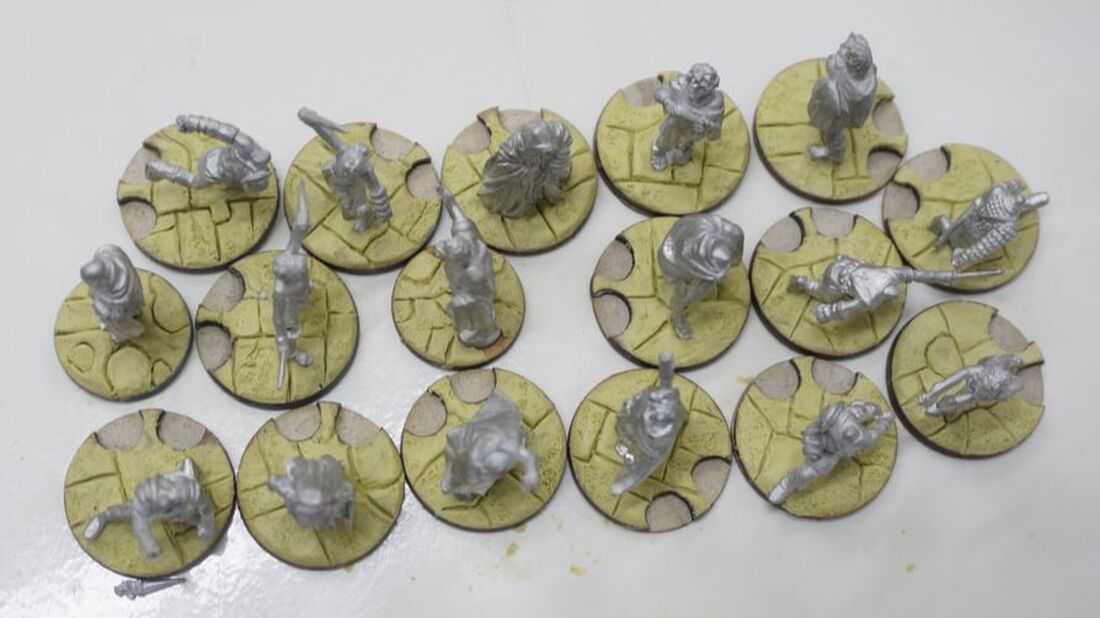 Step 1. Mix your putty and squeeze it onto the base. Rub off the edges to get a bevel and use a cuticle (nail) tool to flatten the top. I also used the pointy end of this tool to clear out the semi circles on the fighter bases.
Step 2. Using a dentists tool (from a craft shop) sculpt lines into the base, making sure they cross and intersect randomly, so as to imply larger and smaller cobbles in a mixed fashion.  Step 3. Using an old tooth brush stipple some marks and dots into the bases to finish. 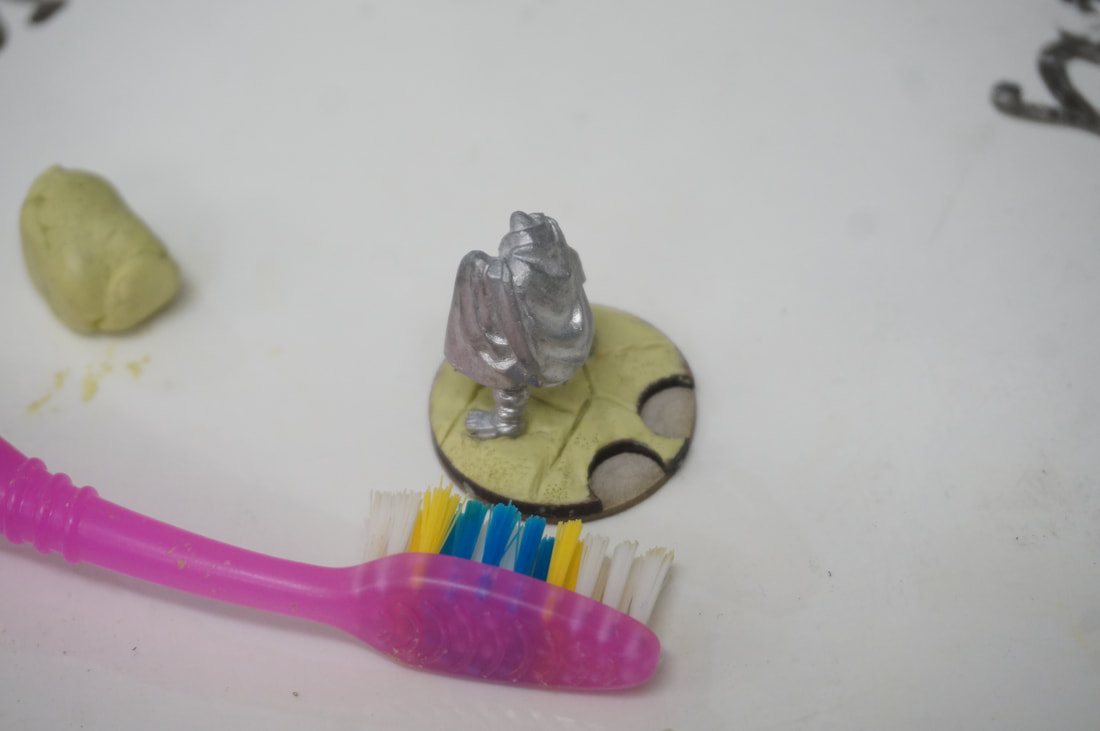 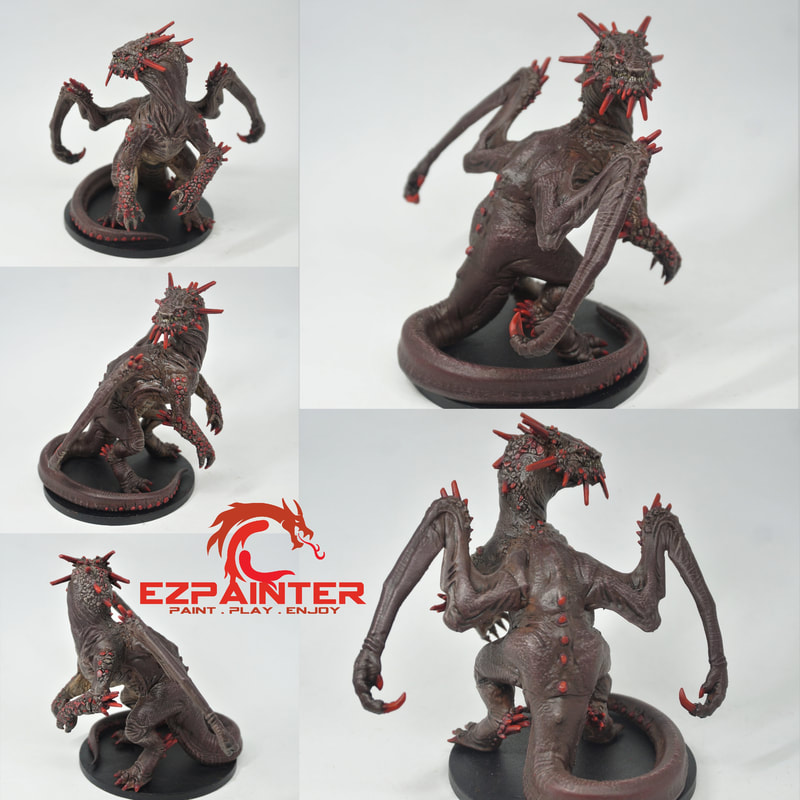 Dragons are always interesting. Dragons by their very nature ae large and for the most part observe naturalistic patterns. The images given to me for this dragons showed many blatant red and pink hues. I had many ideas as to how to get that "red lizard" kind of look while maintaining the obvious ruby association of the gems. I decided in the end to go with a brown undercoat and then work in basecoat, ink heavilly down to a dark brown/black and then slowly mottle and overbrush my way all the way past the original brown tone into a dim red. This i think has achieved the interlacing affect of natural skin, brown scales and the general red tone of the skin without inking it heavilly in red (creating lots of gawdy red pools in recesses) or working up from red, which might have made the model brighter than we wanted. I think the final result is great and i am really proud of how that red mottling worked out in the end for sure. 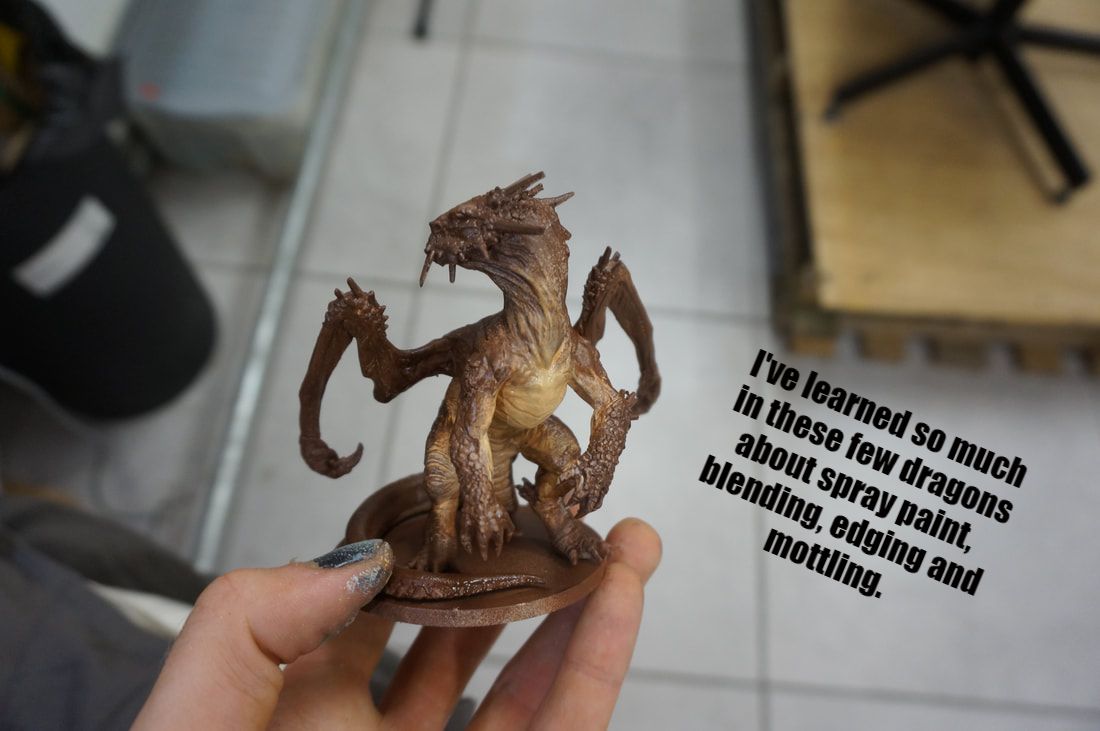 I finished up those roman mobs ( look at this picture i realise i could finish the group base edges). They have been good fun, from picking colors to scultoing and painting the bases. They really came together with the flocking stage and i really enjoy using those tiny autumn leaves, they bring a pop of life to the models. 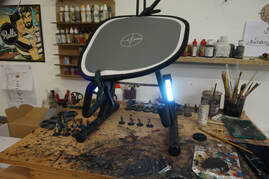 This evening insomnia struck as notice of further lockdown measures on manchester come 1 day before the hottest day of the year here. Such a shame. So as to have enough time to enjoy the sun tomorrow afternoon i powered through those romans with some new brushes i got off ebay, then i knocked up a little photo booth (pictured left) on my work desk and snapped some pics. Multiple ink followed by highlights and some brown lining. A little muddying up, some eye and mouth socket painting, a bit of detailing and voila. Today i was confronted with an age old problem that i've had to deal with for a long time. Unmixed paint. Specfically i have a few bottles (yellows, purples, some browns) that just never seem to mix no matter how hard i shake them. So i had a brainstorm moment and i remembered i've just bought a drill. I wrapped some wire around a bottle to make a "spinny paint bottle holder thing". I gave it a good whirl and whoa...some of these un usable bottles have changed completely. I'm really glad as there was some colors i really wanted to use on these models. 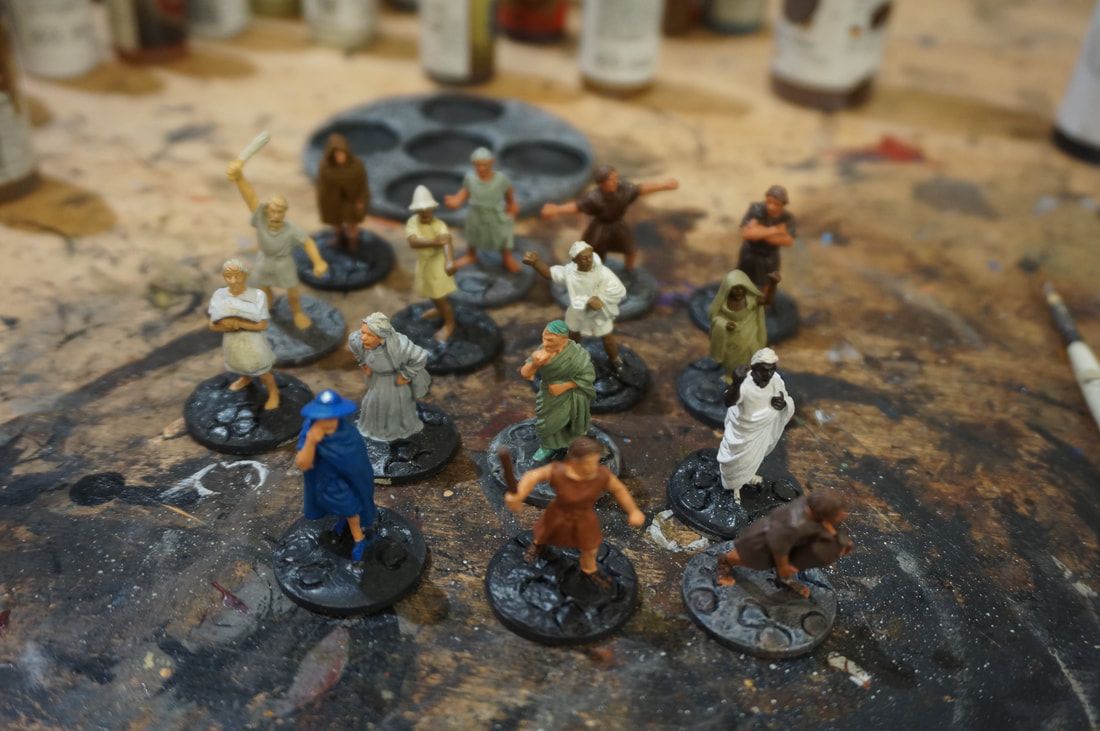 The first thin i wanted to do after i blocked out all of the robes was pick out the skin tones. I attended the very moving and very large Black lives matter protest a few weeks ago, read a bit on the matter and also stumbled upon a great article saying that ancient rome was anything but a white colony. I read into this and i found that in fact "race" in ancient rome would have been even more diverse than it is now with much less white representation across the board. I decided to make these bases at least as mixed as possible by introducing mixed skin tones. It seems like the tiniest little protest in itself but the industry is disgustingly white. And there is no other adjective for it. It's just white people making white miniatures for white people mostly. And it sucks. As a conesquence i always try to ask my clients if they want a mix of skin tones but even white skin is catered for much more easily than dark skin tone sin paint ranges. There literally is very few "dark" skin products. Vallejo skin tones comes to mind as a good one. 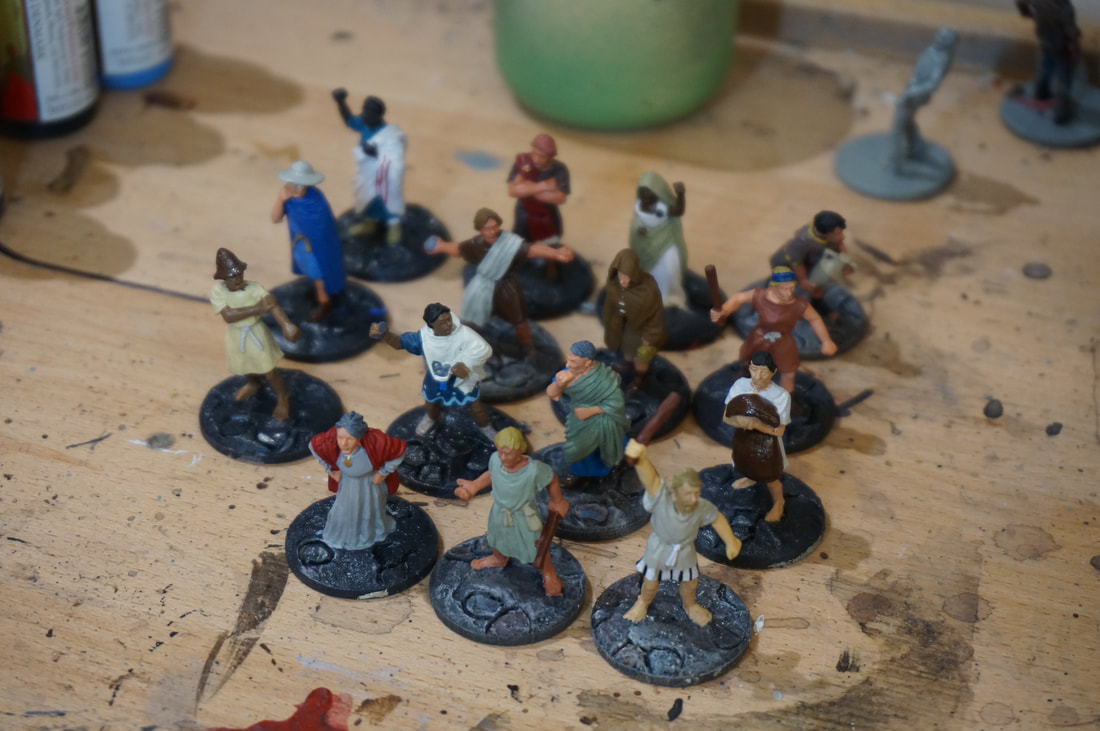 I like to use multiple different color primers that i buy from SPRAYSTER.COM to save money. I have many strong opinions about primer in the wargames industry. The shocking mark up is astonishingly unjust. I save my customers a lot of money by using these other primers. I shall say in short that ALL MATT PRIMER is basically the same in regards to the purpose of wargaming. With some of these they come out a little sheen, so i simply brush them with a matt coat of varnish before painting or inking and they take paint perfectly. Check out sprayster.com. Following a mixed undercoat (leaning heavilly into brown and beige for historical accuracy of sorts) i painted the bases a dark grey (matching the base of the test model.) Many of my clients know my mental health can be u and down, so this last few days i haven't got as much done as i'd like, however i decided to trek on and get these bases done as a test to see how they matched up with the test model. I was nervous that the stamp method i employed on the group bases wouldn't look like cobble and i think i was right with just the grey/brown/beige/grey method. It looked a bit boring. I decided to pick out some of my favorite browns and add them on top picking out individual tiles. That seemed to work really well but it was a bit flat so i mixed my home made "death juice" (recipe to come soon) and some grey paint and i made a dark grey wash. After the grey wash i added a final dry brush of spaceship grey and it really popped, the contrast was there and it looks fantastic. The fit of the bases is ever so slightly tight (i have akward memories of a client once berating me because his bases didn't fit absolutely perfectly - don't worry it wasn't John, John is so nice) so i will see how they feel in a day or two when i'm done painting and then i can always sand them down a tiny bit. RUBY DRAGON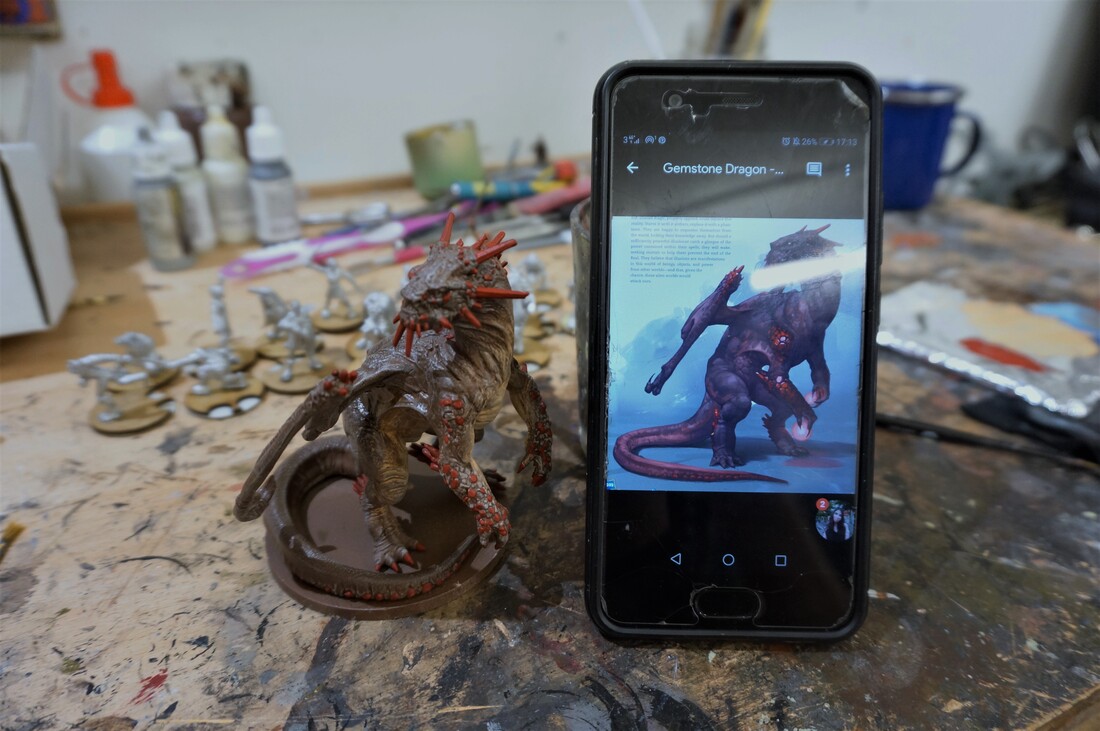 This dragon model is an exciting learning curve. I considered approaching this from a few angles. Firstly i considered dark purple and black primer worked up to red and pink with black washes, then i thought about black and worked up manually without washes to brown red. Finally i decided on a dark brown and skin tone (to develop that skin tone on the tummy of the picture) and then washes and working back up to that purple red hue. It's going to be a challenge. As it stand right now i've done the brown, the skin and the red (block colors) and started with the washes. The image is definitely very red but i'm stumping out on how to get there. I am very understanding of the creative process however and i know we shall one way or another. For the time being i'm very proud of the natural skin fade i've achieved on the tummy and can't wait to see these washes dried. Pictured above, achieveing those natural skin fades with spray, dry brushing, mottling and and overbrushing. With the majority of details picked out roughly i gave the model a liberal wash of Death Juice (my own home made black wash) mixed with Army Painter Strong tone. I think i might repeat this once dry, not sure yet. Otherwise i might just work the skin tones down to a darker set. i can't rightly decide yet.
Basing these romans has been a fun challenge so far. I sat down the other night with a few old kung fu movies and removed the base tabs with clippers. I considered going completely tab less as with the test model but i realised that some of the models wouldn't work that way (thin legs) so i have had to compromise the style a bit to get a uniform (ish) look to the cobble across the board. I kneeded some putty and squeezed it onto the base wity my fingers. i found that the less i thought about it the better a job i did, which then i could clean up with a tool afterwards. After doing the first base i decided to go out and get a better sculpting tool from the craft shop.  The main issue i met with these "multi bases" is the thickness of the putty. If i was to compeltely match it to the fighter i think it'd have looked odd. However in trying to do something a bit different for the multi bases i worry i've strayed to far. This took a fairly long time to get done and i'm happy with the result. Luckilly my clients seem to trust me and usually follow my judgement on orders. I realise looking at this that i could totally add other bits now that it's dry. I also do believe on these bigger bases there will be more brown leaves and tufts.  Just four more mob characters left to do then i'm gonna get on matching those fighter bases to the test model as i feel it's more pertinent to do so with them. That will take a lot longer than expected. 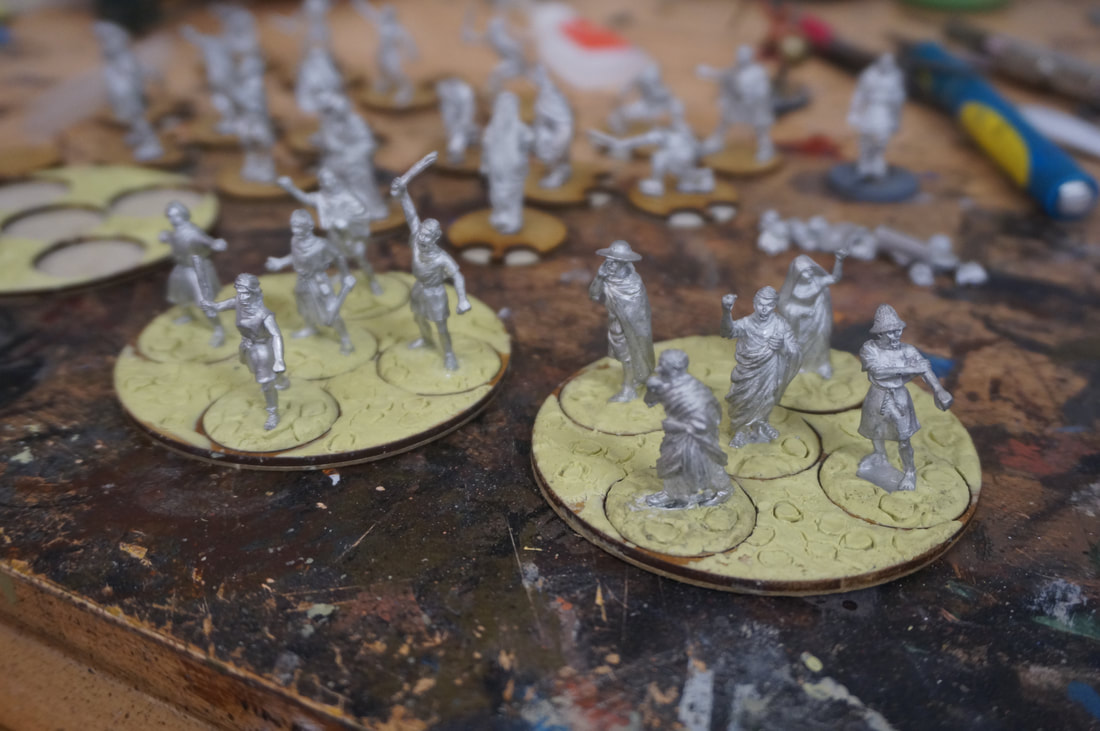 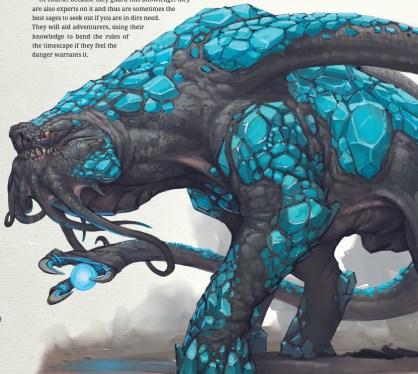 Most of the work on my romans order is hands on basing and stuff for a few days, removing tabs and sculpting bases so i shall post pictures once i get to that stage but for now i decided to jump back to a special order by a newer and exciting client Dom. Dom once sent me a parcel (with a LOT of mini's in it) that got lost by royal mail. It was a horrific moment and luckilly Dom is a super nice guy and understood the issue. Years later we began discussing more work and i was super eager to get back on it for him. I have a big mixed order of models (all for DnD) which is so exciting for me as i tend to paint lots of uniform models, so this order allows me to really flex some working muscles as well as genuinely learn new stuff. The latest model i've finished for this order is this giant ancient saphire dragon. It is an astounding model but i've lost the box with the manafacturer on it. I shall ask my client and maybe he can comment here with the producer.  This model is so large i went hunting around the house for a bigger photo booth or similar and literally found an actual large photo booth so i set up my lights and my tripod and grabbed some great pics for you. I decided to collage them together so you can see all the elements of the job in one picture. 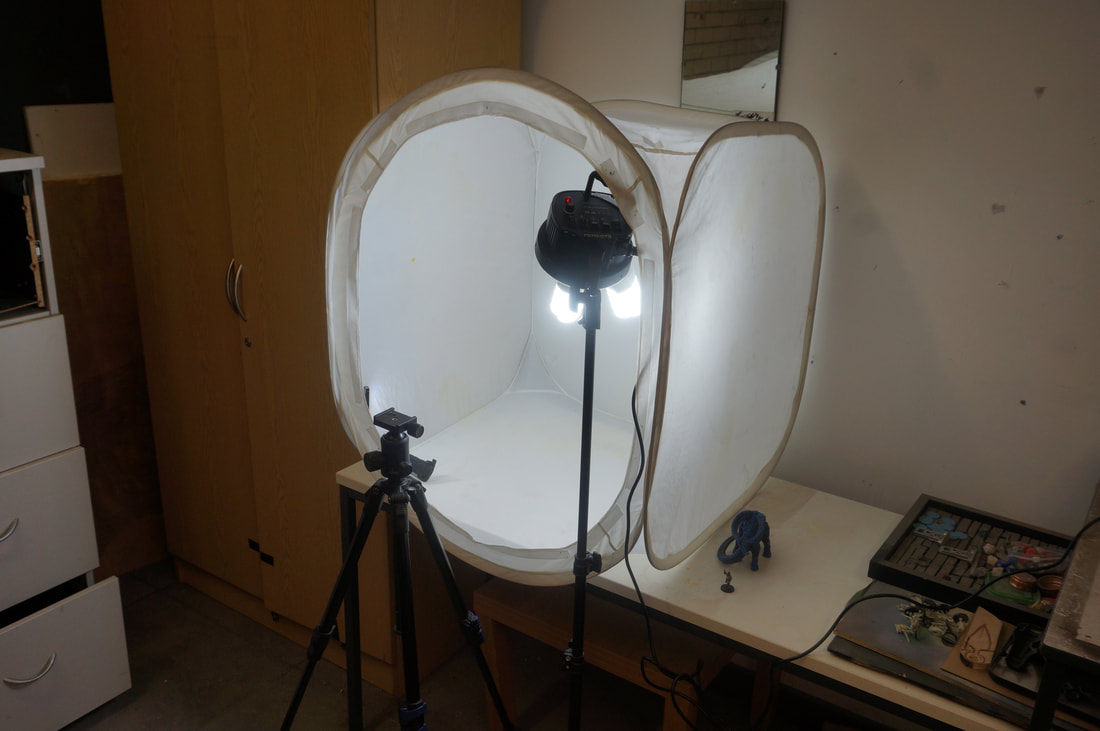 Here is the collage picture i've built, i really hope you like it. Painting this model was a challenge in patience more than anything, all those gems and going back over bits in black then sometimes blue and vice versa. It was Nice to get to the end and then as usual it just kind of came together in the last few moments. Very satisfying. I think i got the contrast down, i hope my client likes the blue i've gone with.  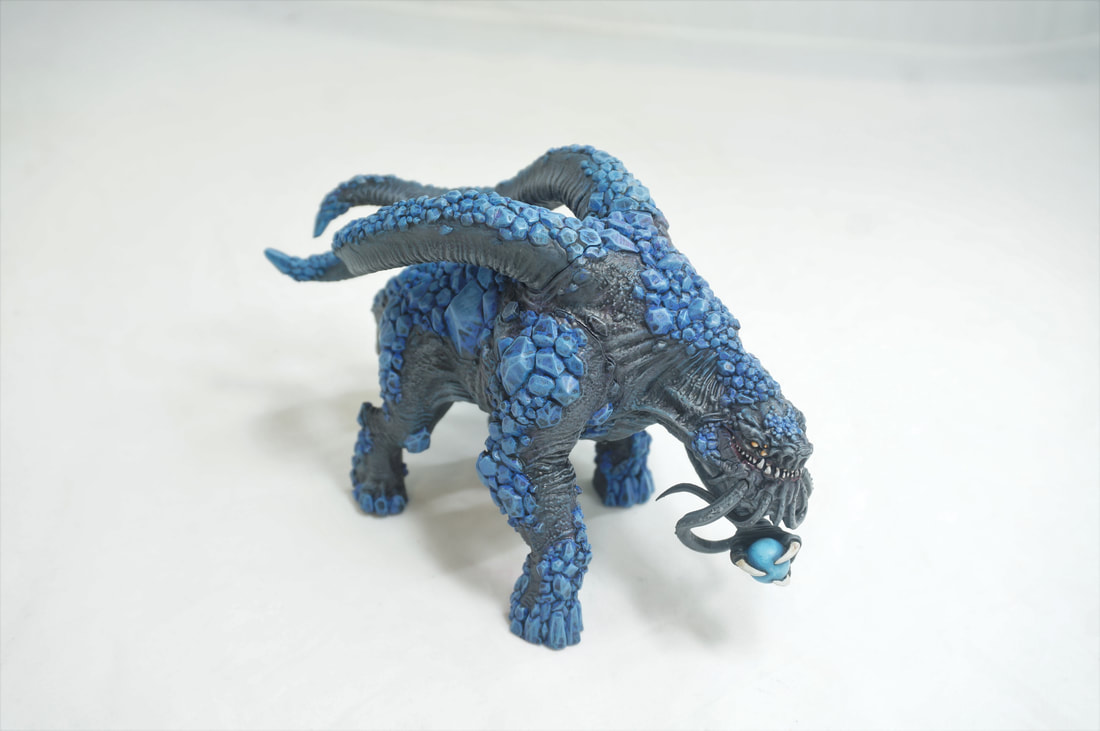 How about a size comparison... 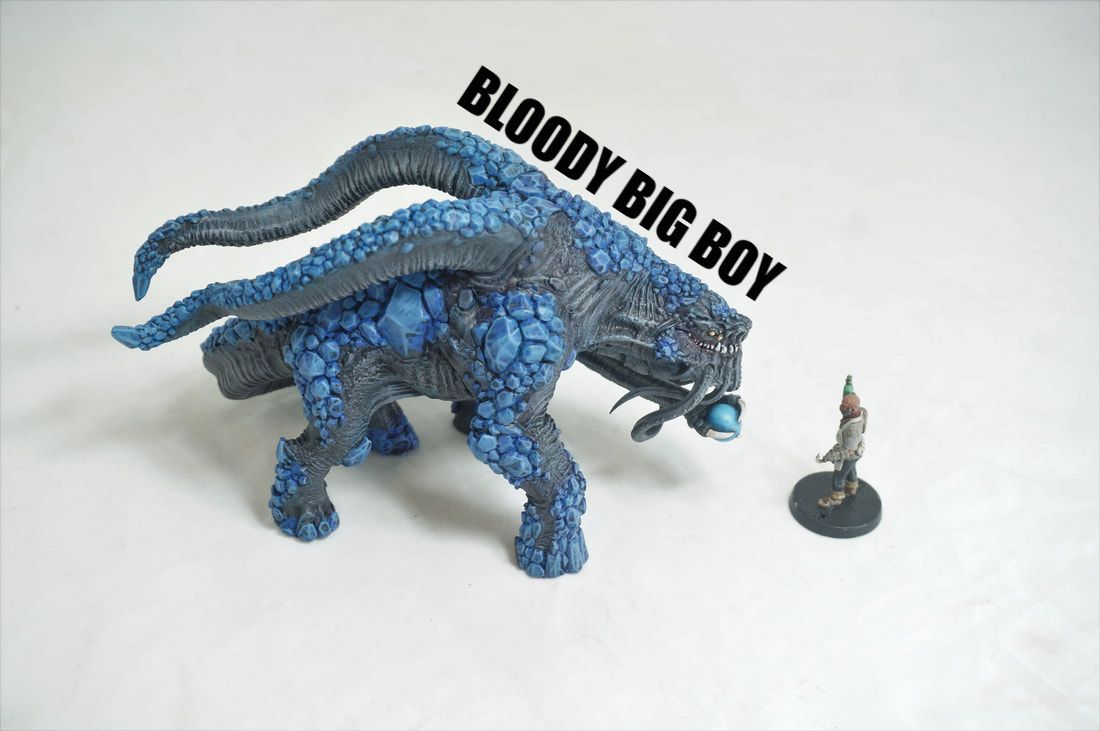 What a behemoth! I am excited to get on with the next one now (there is two more dragons before i get on with the rest of the infantry).
I shall post tomorrow about some of the other finished pieces of this very fun order. I hope you enjoyed this update. I surely did. I recently picked up a big box of colorful flowers (multiple colors) from ebay. What a good idea that was! I usually only pick up one or two siflor tuft sets a year at conventions and such but i am glad i got this mixed box for this order, it really adds a splash of color and excitment to these very brown models. I think also that the bright coloring leans into the cartoony element which is great. I'm really chuffed with this order and i would definitely paint these again. Thanks John! PAINTING THE ROMAN COBBLE STREETS
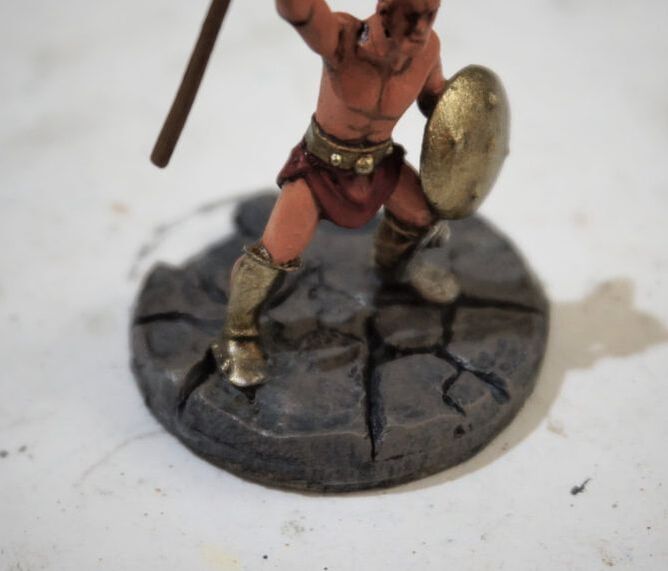
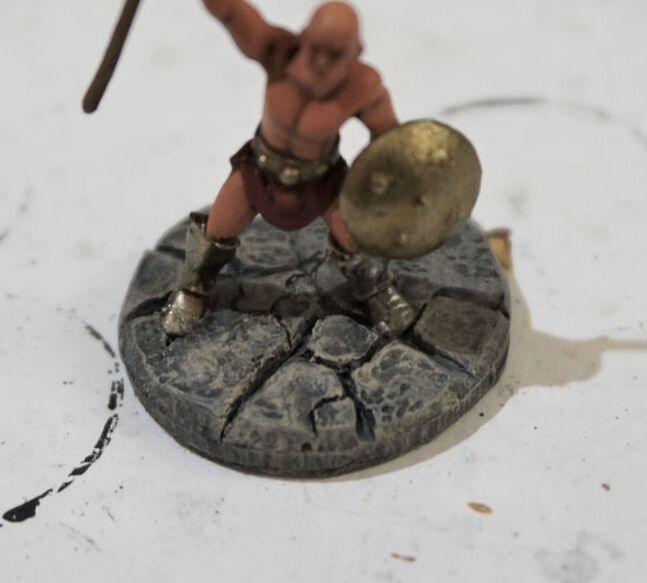
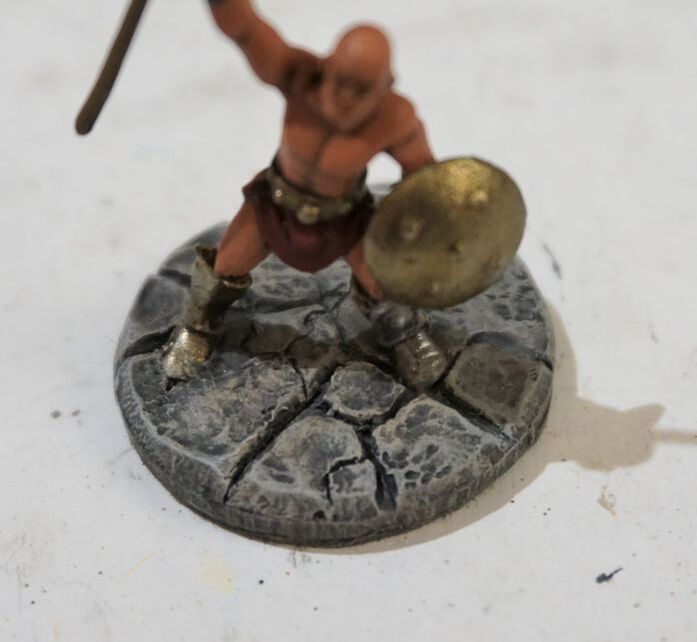
starting with a dark grey base i dry brush the base with a light chocolate brown (craft paint) and then a white beige (craft paint) finally i gently drybrushed the base and cobble edges with spaceship grey (vallejo). Using a mix of browns, beiges and greys definitely lands that "dirty roman street" look while not leaning to far into sandstone or grey stone.
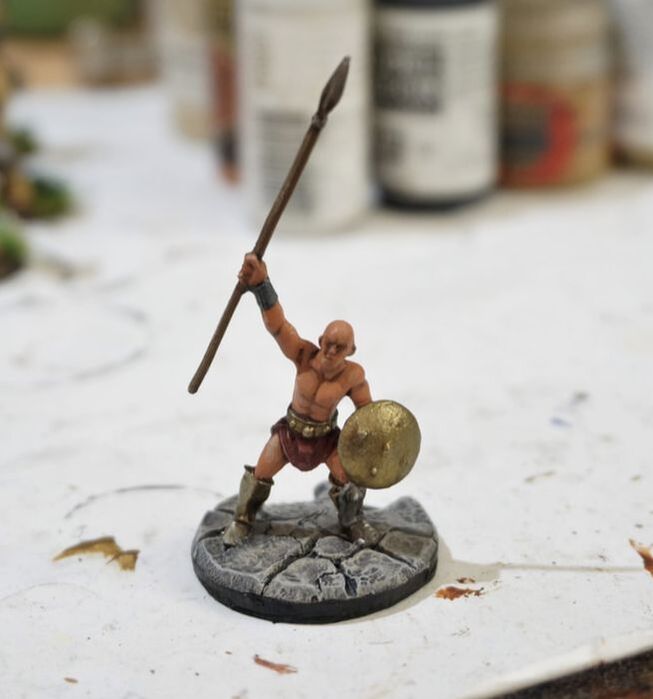
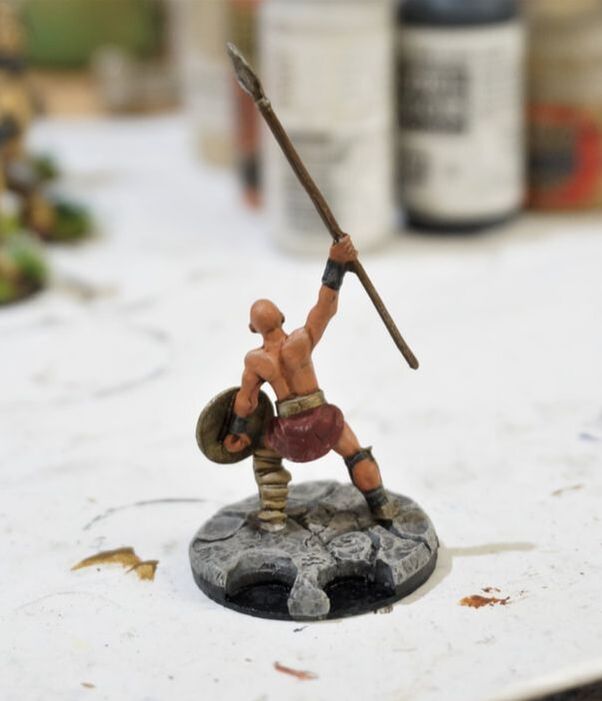
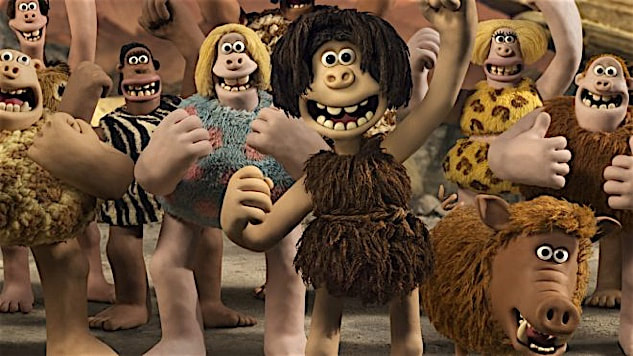
Using a rough and very dry brush i gave the whole model a quick beige dry brush using the craft paint from stage 2 of the basing. This added a musky dusty look to the model which is beyond appropriate for a gladiator style model. As a finishing touch i painted the under base black and added some brown grass and a few fallen leaves. 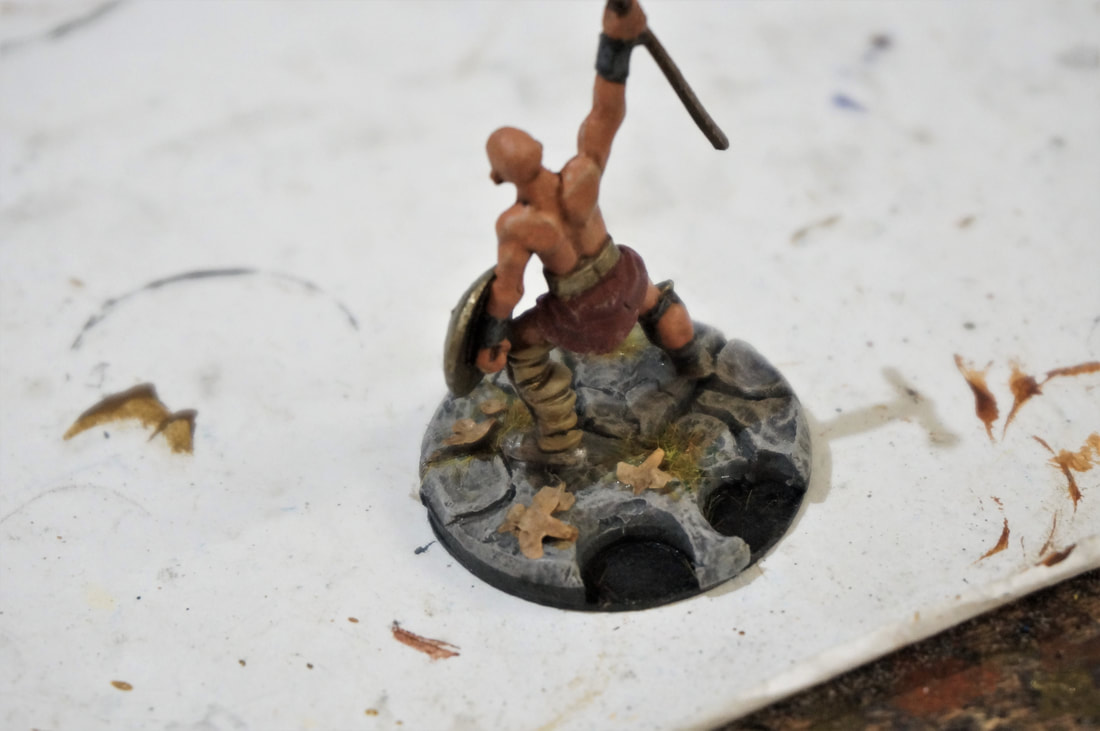 FINISHED TEST MODELI am super chuffed today with how well that base came out. I decided to carve the edges a bit flatter which definitely makes it sharper and more professional. I undercoated the model grey and then painted the base dark grey and put some basic colors down on the model itself. Luckilly these roman models are beautifully smooth and sleek so they take paint very well. To the contrary the ink seems to have swamped the miniature a bit. Being that i work in full body washes like this all the time i am sure it'll come out lovely in the end. I also got 99% of the painting done on those cavemen (although it might look like there's lots to do) i have to just do the final overbrush to bring out all of those furs. I have had a lot of fun painting these and the quirky nature of them. You have to forgive the sculpting mistakes with "first ventures" like this when it comes to sculpting but i must say the feet are terribly dissapointing, they're so cloggy and blurred (detail wise) that they're basically not there. It's such a shame. 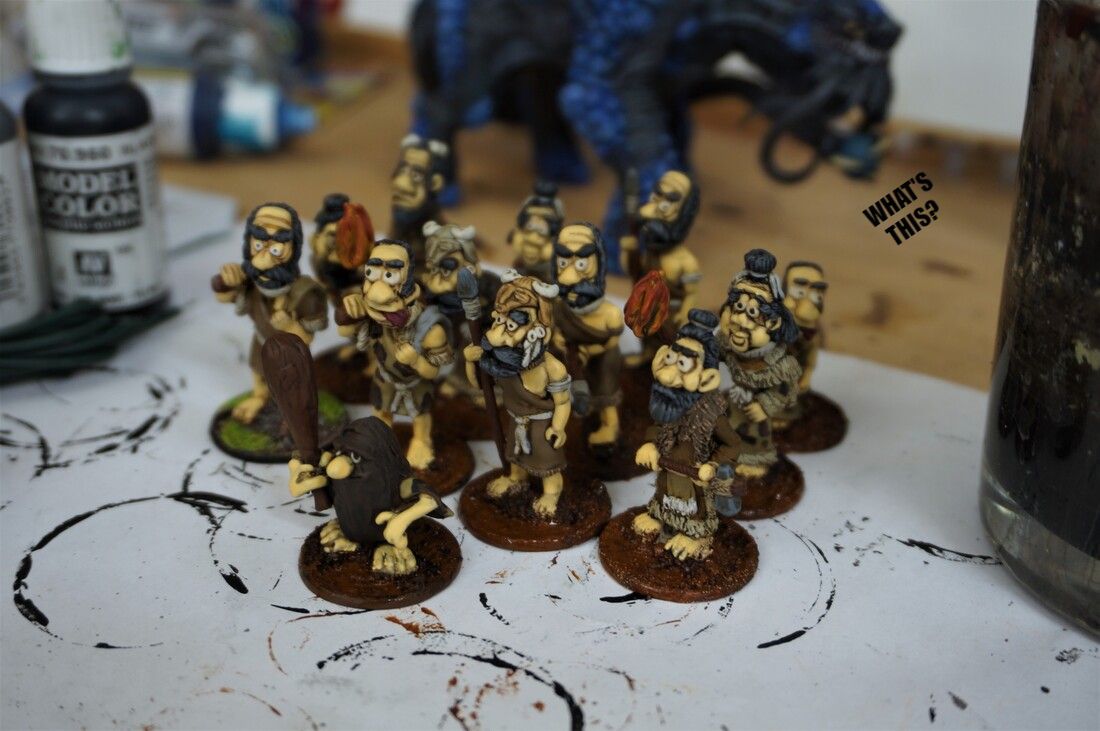  A long time ago i used to sculpt a bit here and there. One of my favorite mediums to work in was Miliput. It's a fascinating alternative to green stuff and comes in four different versions (as far as i know they're different hardness). I bought some miliput standard for these bases. Miliput is a fraction of the price of green stuff (at about £3.00 for about £15.00 worth of green stuff equivalent) and it really is the actual basis of green stuff. Games workshop created there own "miliput" for citadel and it stuck as an industry mainstay, mainly due to it's destinctive green color, a clever marketing ploy by the evil empire indeed. Many professional sculptors use both green stuff and miliput in their work for three ups, depending on the part of the model they're sculpting. 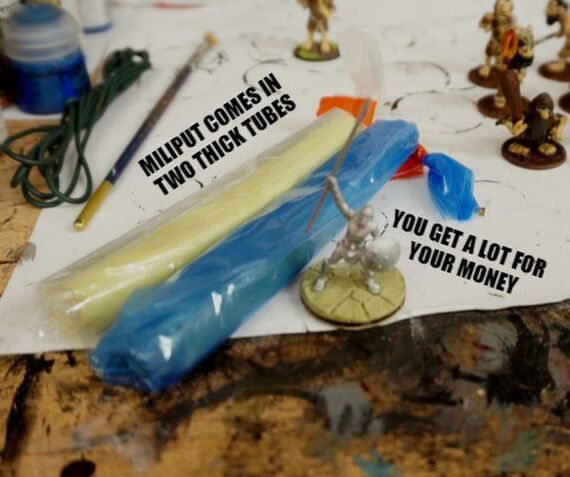 Miliput mixes faster than green stuff, although if mixed to wet it does cover your hands in a dusty paste, but it washes off really easily. I tend to work it dry then use wet tools after. For this base i squeezed a sausage onto the base and then worked the cobble effect in with a cuticle tool (used during manicures and picked up from pound land for next to nothing in a nail kit). The miliput set to hard in about three hours, but will need to cure overnight for painting. I couldn't wait any longer as i really wanted to see this fighter on his base for reference. It worked out really well and the effect really sells the "feel" of the model. I can't wait to paint this one! 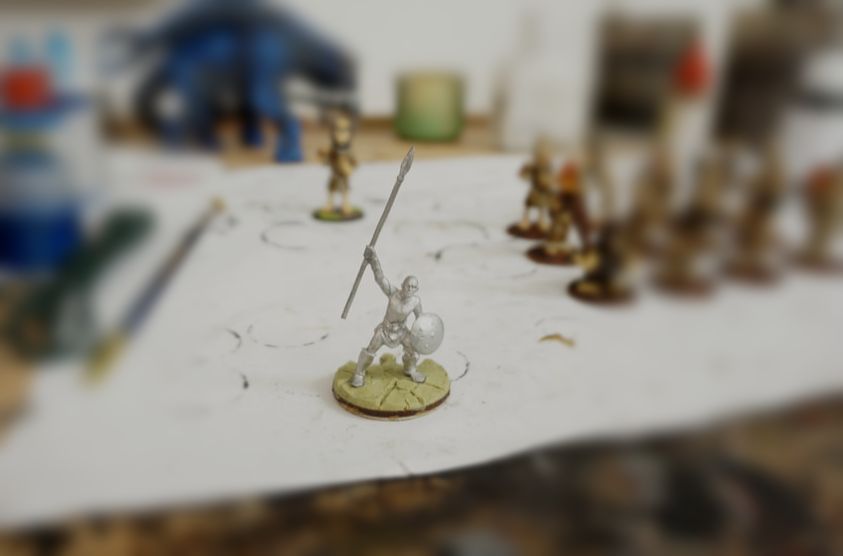 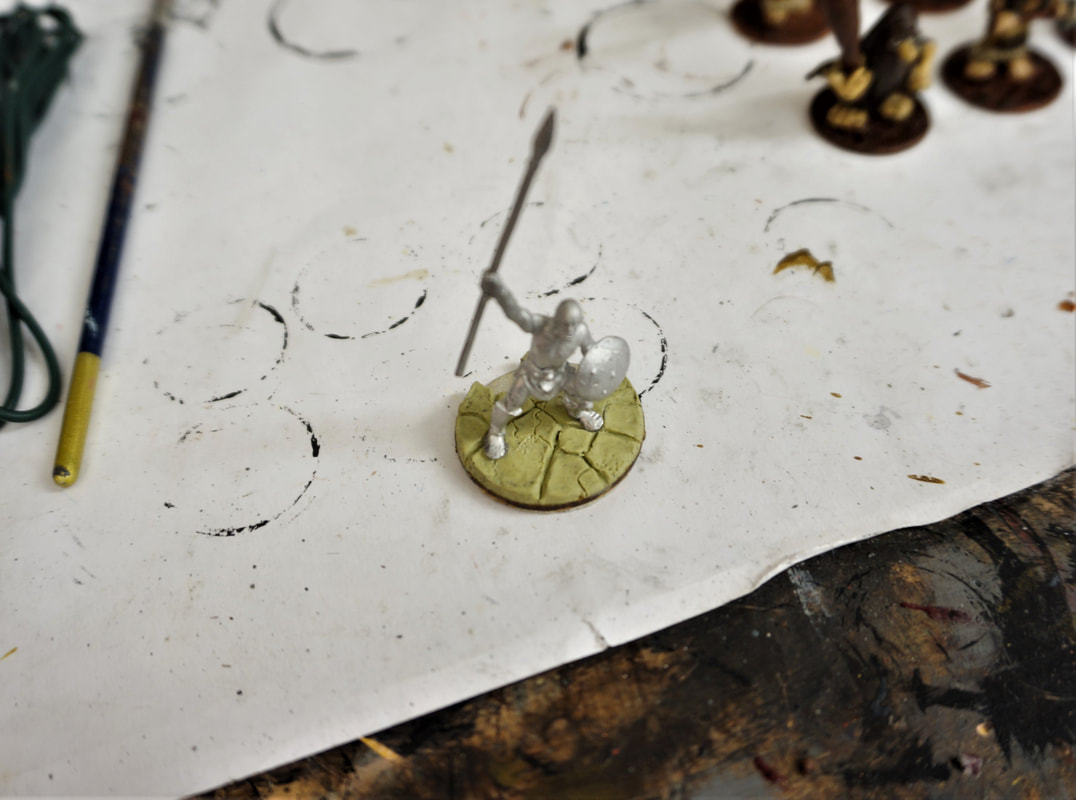 I also got a wash on those cavemen and my black/brown mix worked perfectly bringing to life all those larger flatter skin areas. as with most of my work the proof is really in the pudding, so i can't wait to get this lot done and in the photo booth to show off these whacky sculpts. 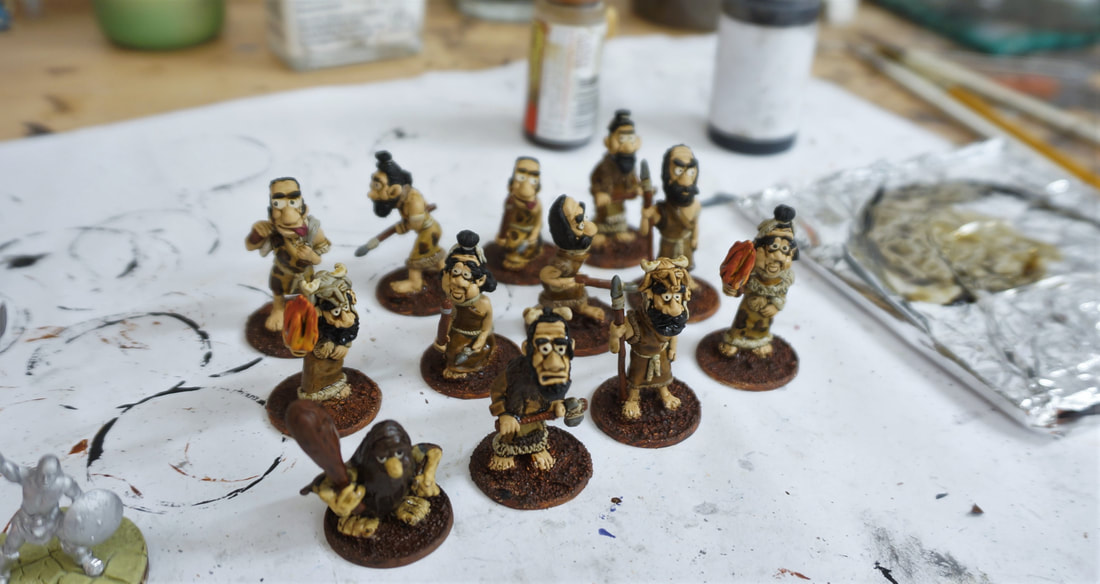 BLIND BEGGAR GAMES CAVEMENThe beauty of aiming at smaller comissions these days is that i get these tiny gems that come across the desk once in a while. Sometimes its a vintage model, sometimes its a unique brand. Today i put the finishing touches on the base coats for these fantastic cartoon cavemen from Blind Beggar games. kickstarter link: https://www.kickstarter.com/projects/blind-beggar/palaeo-diet-the-tribe/description  They're very fun to paint and i honestly had no idea what i was getting myself in for. As a big fan of Wallace and Gromit (and all ardman animations) i personally derive a sense of familiarity from them in realtion to that style. My client (John, a lovely man i met a few years ago in person at a convention who has a jovial disposition and a kindly demeanour and with whom i've had a long running and trusting relationship) wanted them as they are on the kickstarter page, but i cleaned up the style a little making the eyes a bit mroe cartoony and a bit less...creepy? Once the paint has cured on these models i will get them inked and then get all those lovely cartoony details back up to level with some highlights. i'm thinking a home made black wash for these so that the minor detailing in the low quality sculpting can pop a bit more and all the furry textures come out also providing a little automatic black lining which would suit this gawdy type of miniature.
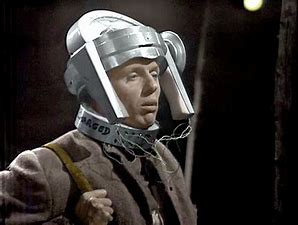
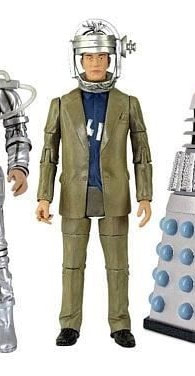
GANGS OF ROME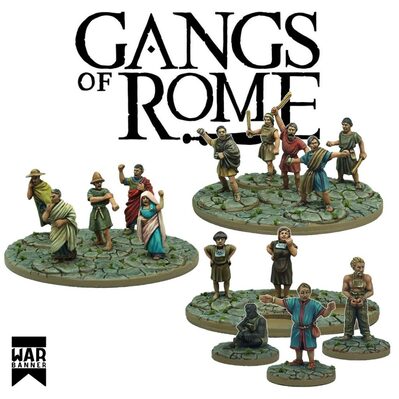 My second lot from this same client this week is a Gangs of rome order. This lot will receive a much more naturalistic and realistic paint job with softer and smoother highlights that the cartoony Cavemen. I personally have some negative thoughts on the gangs of rome pricing model (how it's ridiculous) that i won't share in detail as this blog is about art and the process and not my thoughts on capitolism, however i am glad none the less to get a chance to paint some romans and more specifically civillians as i am not a fan of rank and file roman soliders (work wise) as they can be a pain! (anything uniform can be a pain for quick work, but bright red armor is a buggar to get right en masse). Painting all of these nice warm cloth colors should be a pleasure. I recently read an article about how ancient rome was not white at all but rather an extremely mixed race place. I may ask my client if he fancies a mix of skin tones.  As with all of my orders the romans have a dedicated tray in the workshop that helps me to keep organised. I have stuck them on pennies but my client and i are still communicating about the best approach for basing. I have now received the mdf bases that are required for the game in the post but there is one or two missing and i think maybe the suppliers didn't send them to my client. I am sure we will hash this out soon. In the meantime i attempted to remove a fighter from his tab base with a small saw that my flat mate has. It was a success and he came off smoothly at the bottom of his feet. So i mixed up some miliput and i made a test base in "cobble" finish. I haven't sculpted in a long time, so that was a very satisfying process. I can't wait for it to cure so i can drill his feet and get him onto it, and get a test model painted for this lot. I could of course paint a test model as they are but i don't want to get around to removing their tab bases and then ruin any paint jobs (you have to hold them pretty toughly to saw off the bases). So for now i shall progress on this order again soon once we have ironed out the kinks. 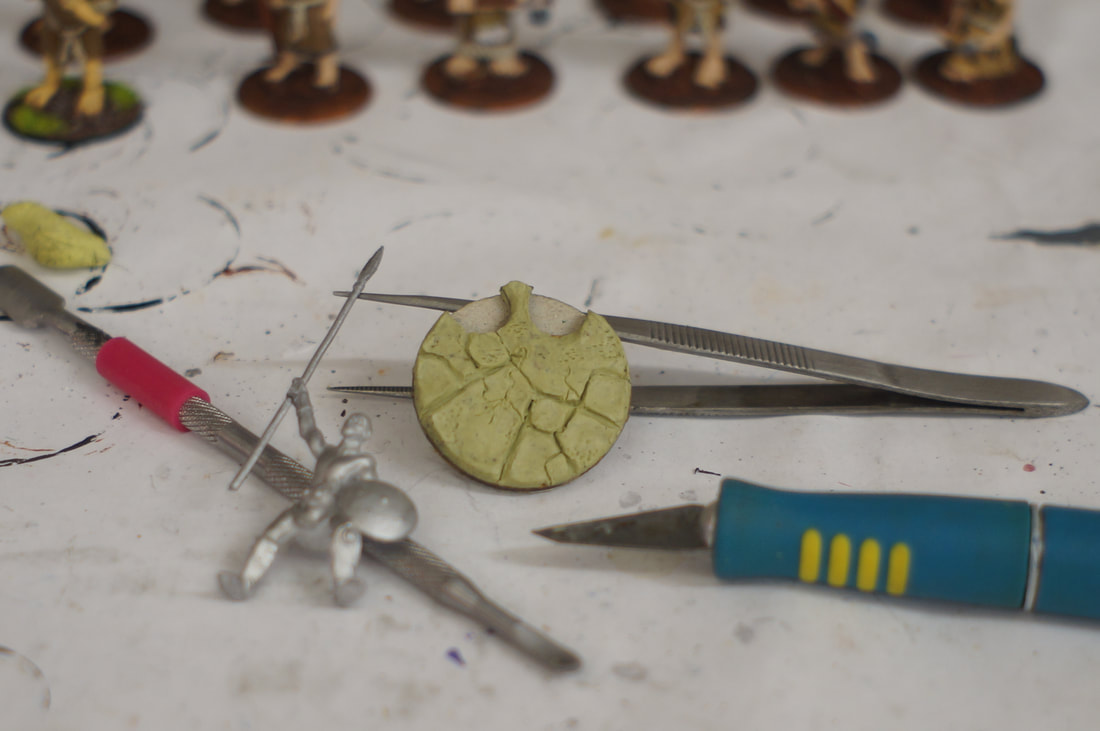 Welcome to the new EZPainter blog. For a long time i've worked in relative silence. I am unsure as to why as i talk to my clients daily but i think its a nice idea to start blogging my work again for my fans and for myself. I plan to be releasing updates hopefully once a week of my mixed prjects i've got on the table. In this first post i am sharing a small commission i've just finished for one of my oldest clients, Dave. Me and dave have a very long working relationship and his loyal trust of my work, style, speed and efforts has always been flattering and boosting for me. Dave often sends me small orders of about 6-10 models and as such i tend to get the chance to "play" with painting. DOCTOR WHO BADDIES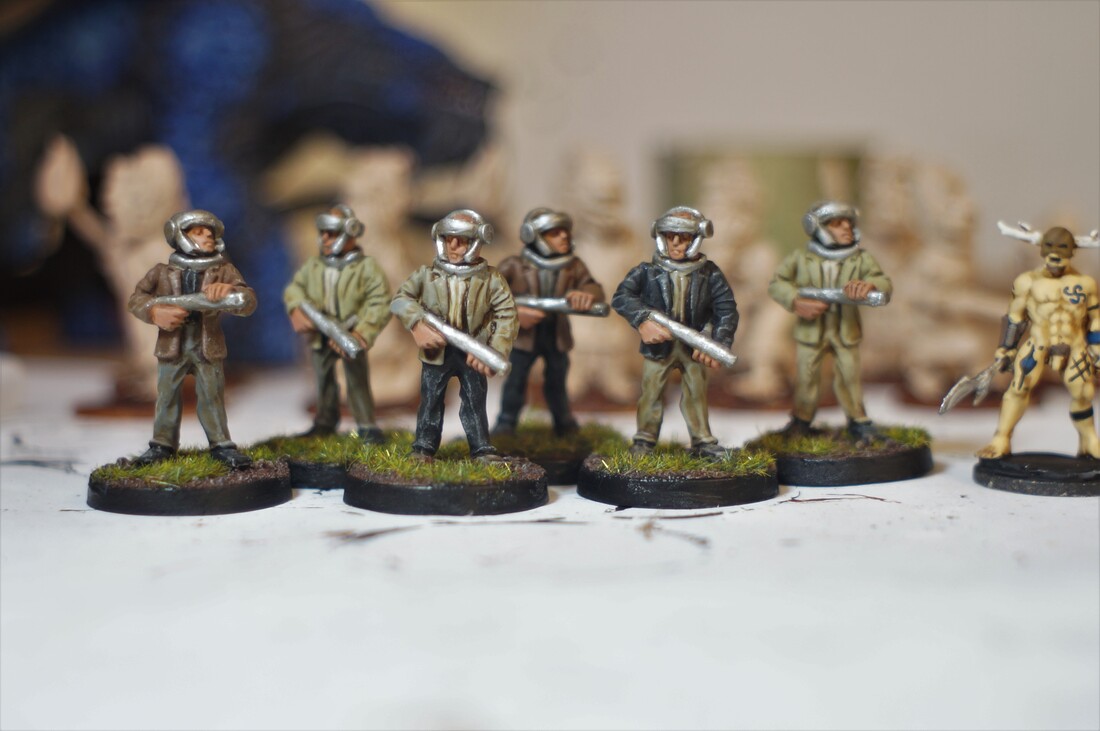 I think these great "old school" white metal sculpts are from Crooked Dice who make some of the best doctor who villains i've ever seen. They could be from black tree designs but i think they lost the doctor who license a long time ago. Dave provided me with these images to copy, and from them i got the idea of "60's office men" so i chose colors to suit.
Dave has been a client so long that a lot of the work i've done for Dave is done using my "old" style of block colors/ ink/ flat drybrush so many of the mdoels i do for Dave i do this way for continuity within his collection. For these models i also picked out the skin tones and metal after inking just so that they had that extra little pop. DRUIDS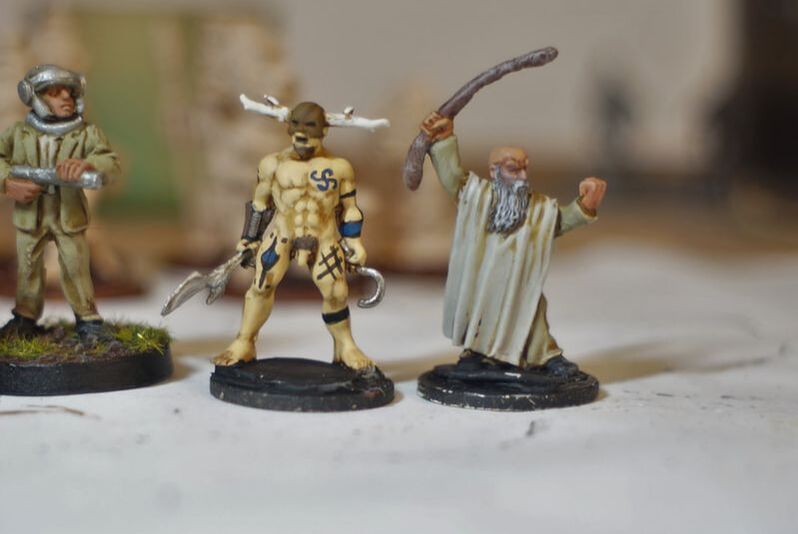 These Warlord druids have long been on my paint list. I first eyed them back in 2009 when i was living in cardiff. Dave threw these in the package for me to put a lick of paint on. It was fun painting the tattoos but i have a gut feeling Dave might want a little touch up on those, they hold up much better at table eye view than they do in photography. Free hand isn't my forte but it does still excite me, as does any challenge. |
SUBSCRIBE TO FOLLOW ALL UPDATES.
ABOUTA blog for the w.i.p element of the EZPainter process. ARCHIVES
March 2024
|


 RSS Feed
